Module Visibility
Control which parts of the product a customer can see.
Turn a module off and it disappears from the navigation for every user in that customer account.
Auth portal › Access Control › Module Visibility
Who can use this
| Role | Access Control menu |
|---|---|
| Org Admin (MSP) | Yes |
| Company Admin (DSP) | No |
| Support Agent | No |
| User | No |
If you do not see Access Control in the sidebar, your role does not include it. A Company Admin cannot change their own module visibility — ask the MSP that manages the account.
MSP and DSP
| MSP | The parent organisation. Manages one or more companies beneath it. |
| DSP | An individual company. Either sits under an MSP, or stands alone. |
In the customer selector an MSP appears as a heading with its DSP companies nested underneath. Pick the specific company you want to change: module visibility is set per company, not per MSP, so changing one DSP does not affect its siblings.
1. Choosing a portal
The first screen lists the portals available to the selected customer, each showing how many modules are currently included.
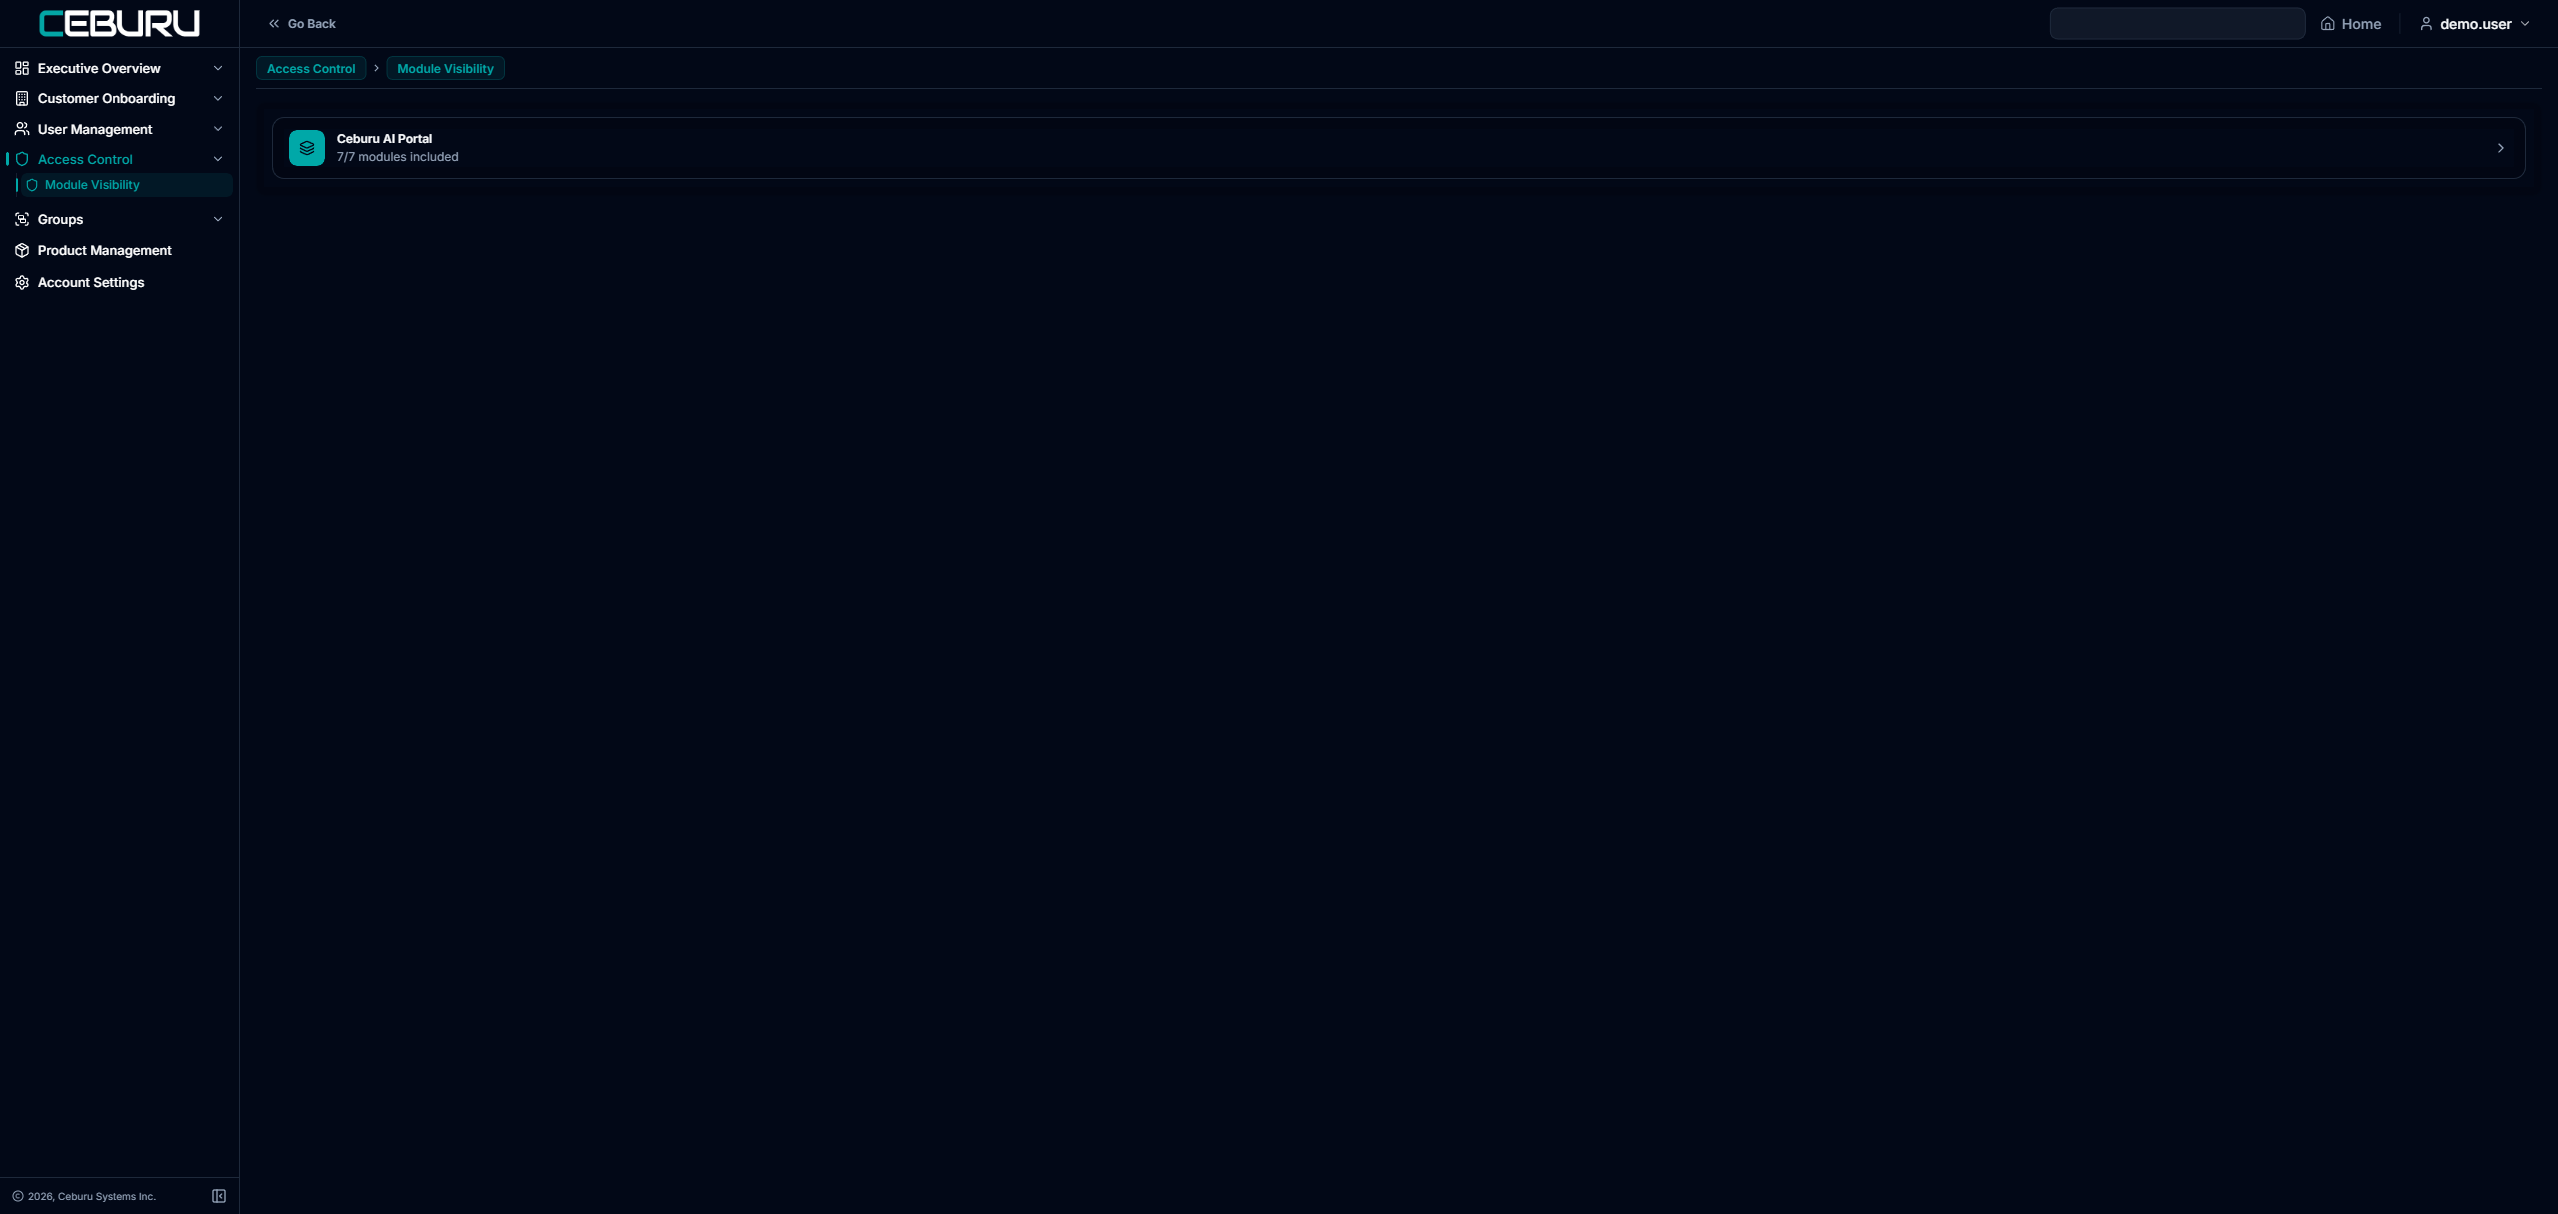
| Customer selector (top right) | Everything on this page applies to the customer shown here. Change it before you make edits. |
| Portal card | Click anywhere on the row to open it. |
| “7/7 modules included” | Modules currently switched on, out of the total available. |
2. The portal screen
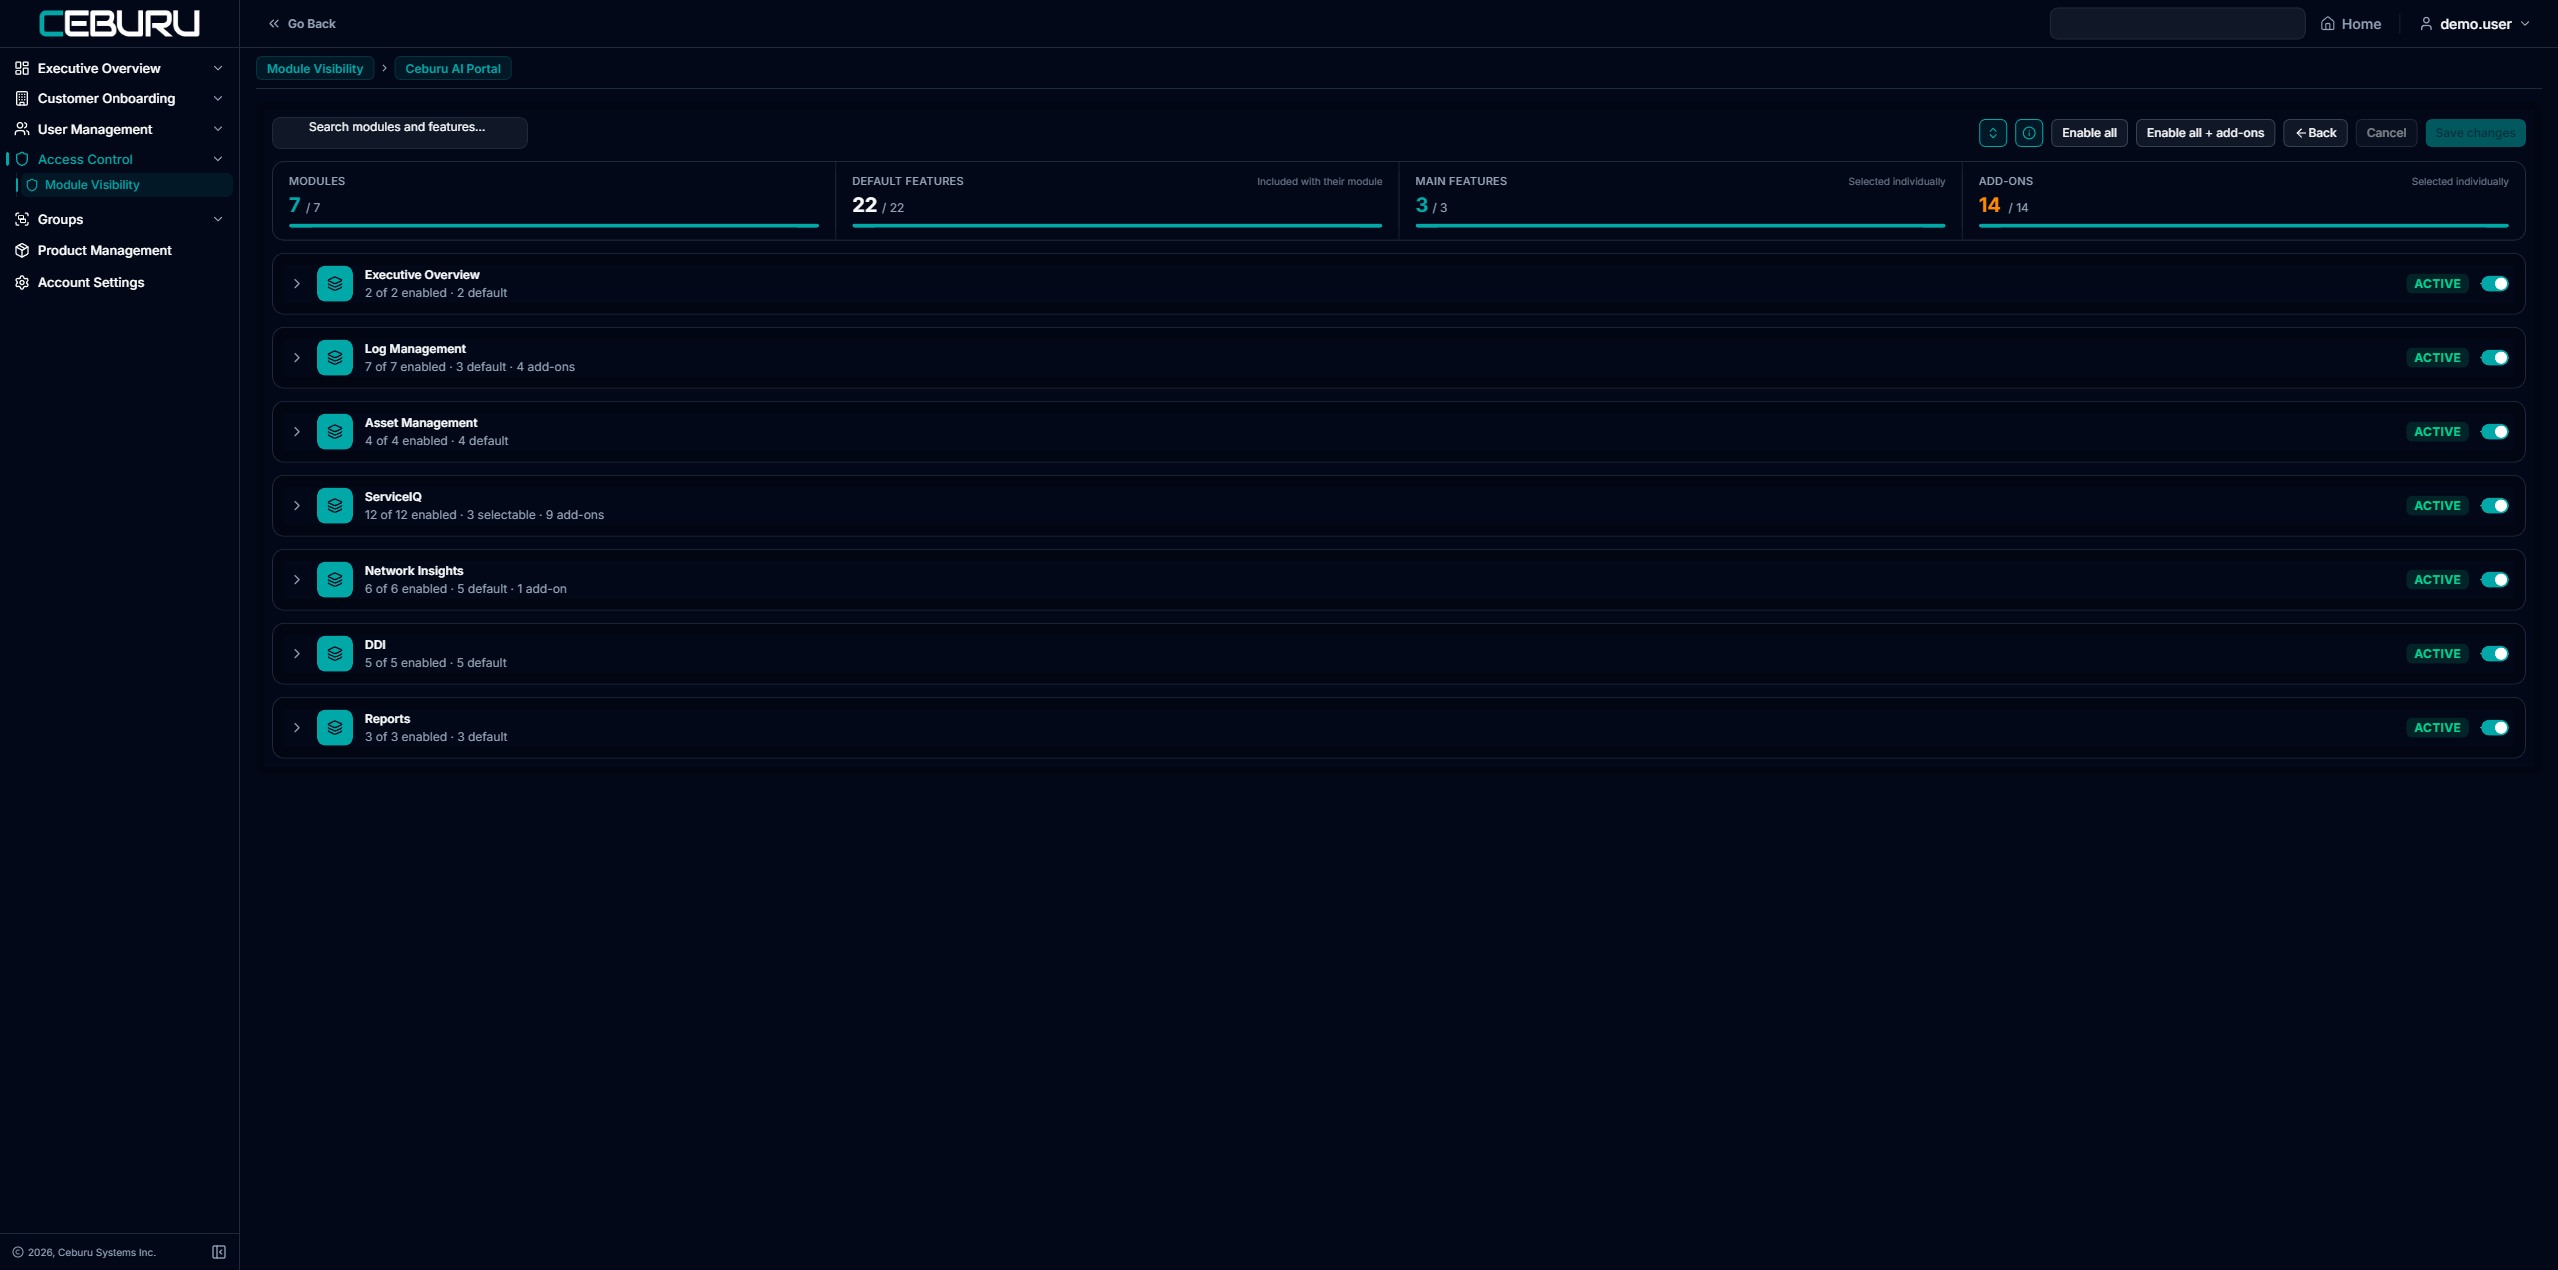
The four counters
Across the top you see what the customer has today.
| Counter | Meaning |
|---|---|
| Modules | Top-level products switched on, for example Log Management or DDI. |
| Default features | Included automatically with their module. Nothing to choose. |
| Main features | Selectable within a module. At least one must stay on. |
| Add-ons | Optional extras, on or off individually. |
The toolbar
| Control | What it does |
|---|---|
| Search modules and features | Filters the list as you type. |
| Expand / collapse icon | Opens or closes every module at once. |
| Legend icon (i) | Shows what the three feature symbols mean. |
| Enable all | Switches on every module and its default features. Leaves add-ons alone. |
| Enable all + add-ons | The above, plus every optional add-on. |
| Back | Returns to the portal list. |
| Cancel | Discards everything you have changed since opening the screen. |
| Save changes | Greyed out until you change something. |
Leaving the page without saving discards your edits.
Reading a module row
Each row shows the module name, a summary, an ACTIVE badge and a toggle.
Log Management 7 of 7 enabled · 3 default · 4 add-ons | ACTIVE ON |
Turning the module toggle off hides the whole module, including everything inside it. Use the arrow on the left to expand it and work feature by feature.
3. The three kinds of feature
Open the legend icon to see this at any time.
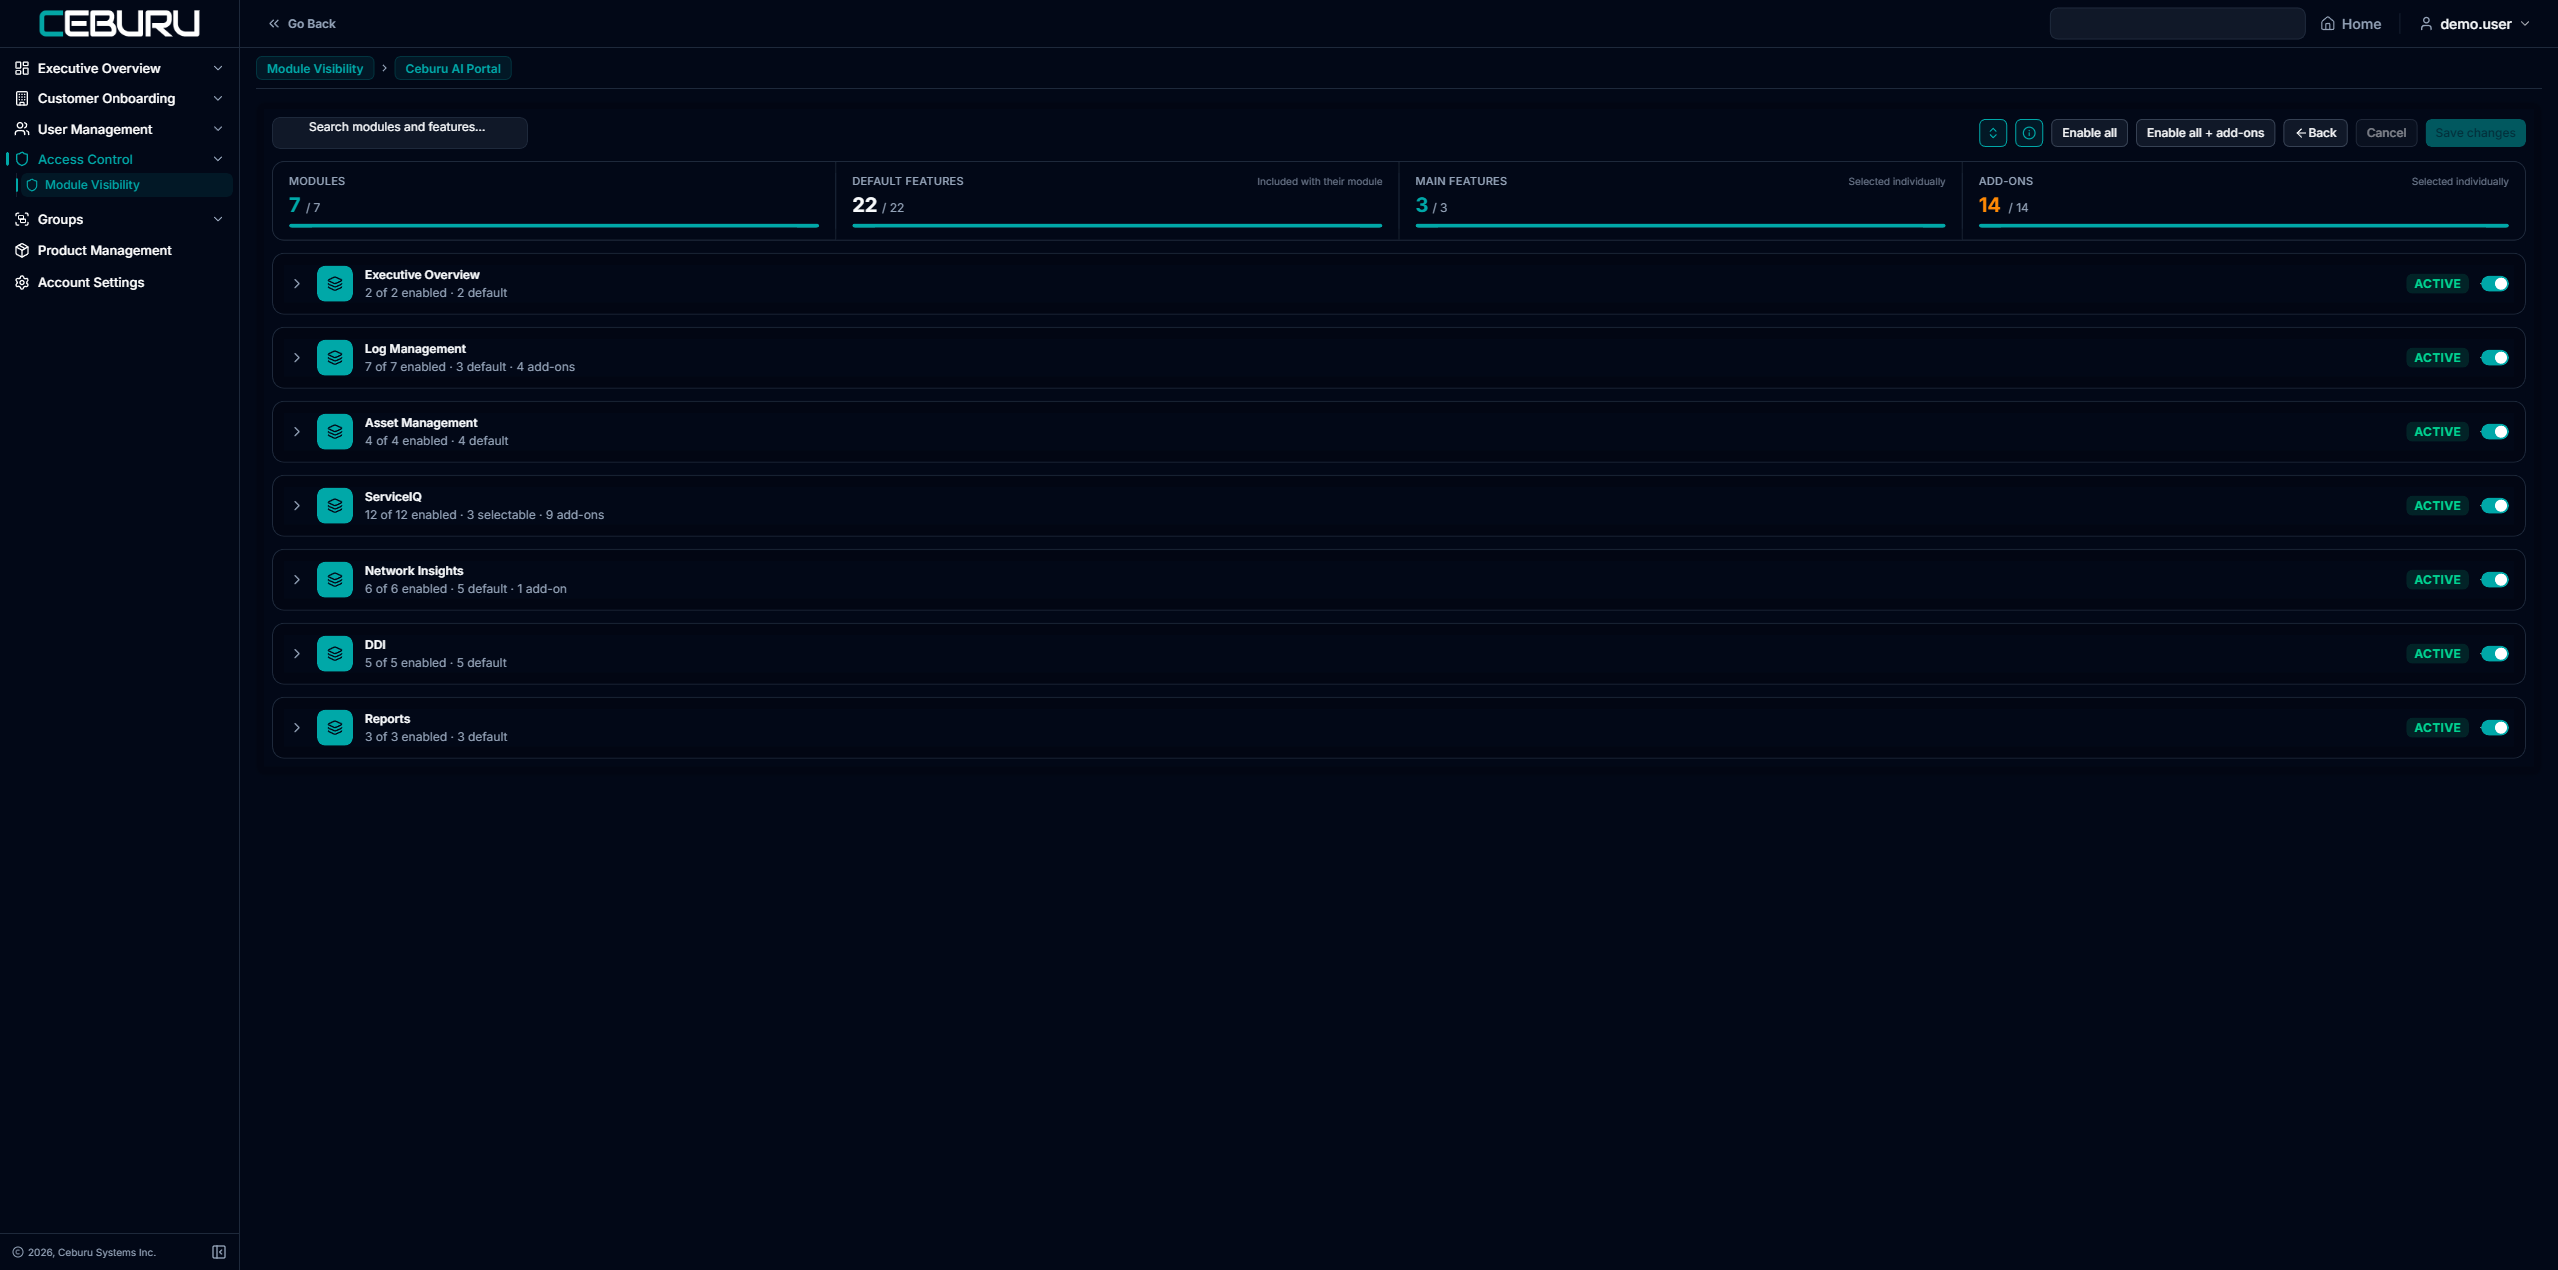
| Kind | Marked with | Behaviour |
|---|---|---|
| Included | A padlock and the label “Included” | Always on with the module. Cannot be switched off on its own. |
| Main feature | A layers icon and a toggle | Selectable. At least one must stay enabled. |
| Add-on | A plus sign and an ADD tag | Optional. Toggle freely. |
This is why some rows have a toggle and others only show the label “Included”. Included features follow their module and have nothing to decide.
4. Included features and add-ons
Expanding a module shows its features grouped by kind.
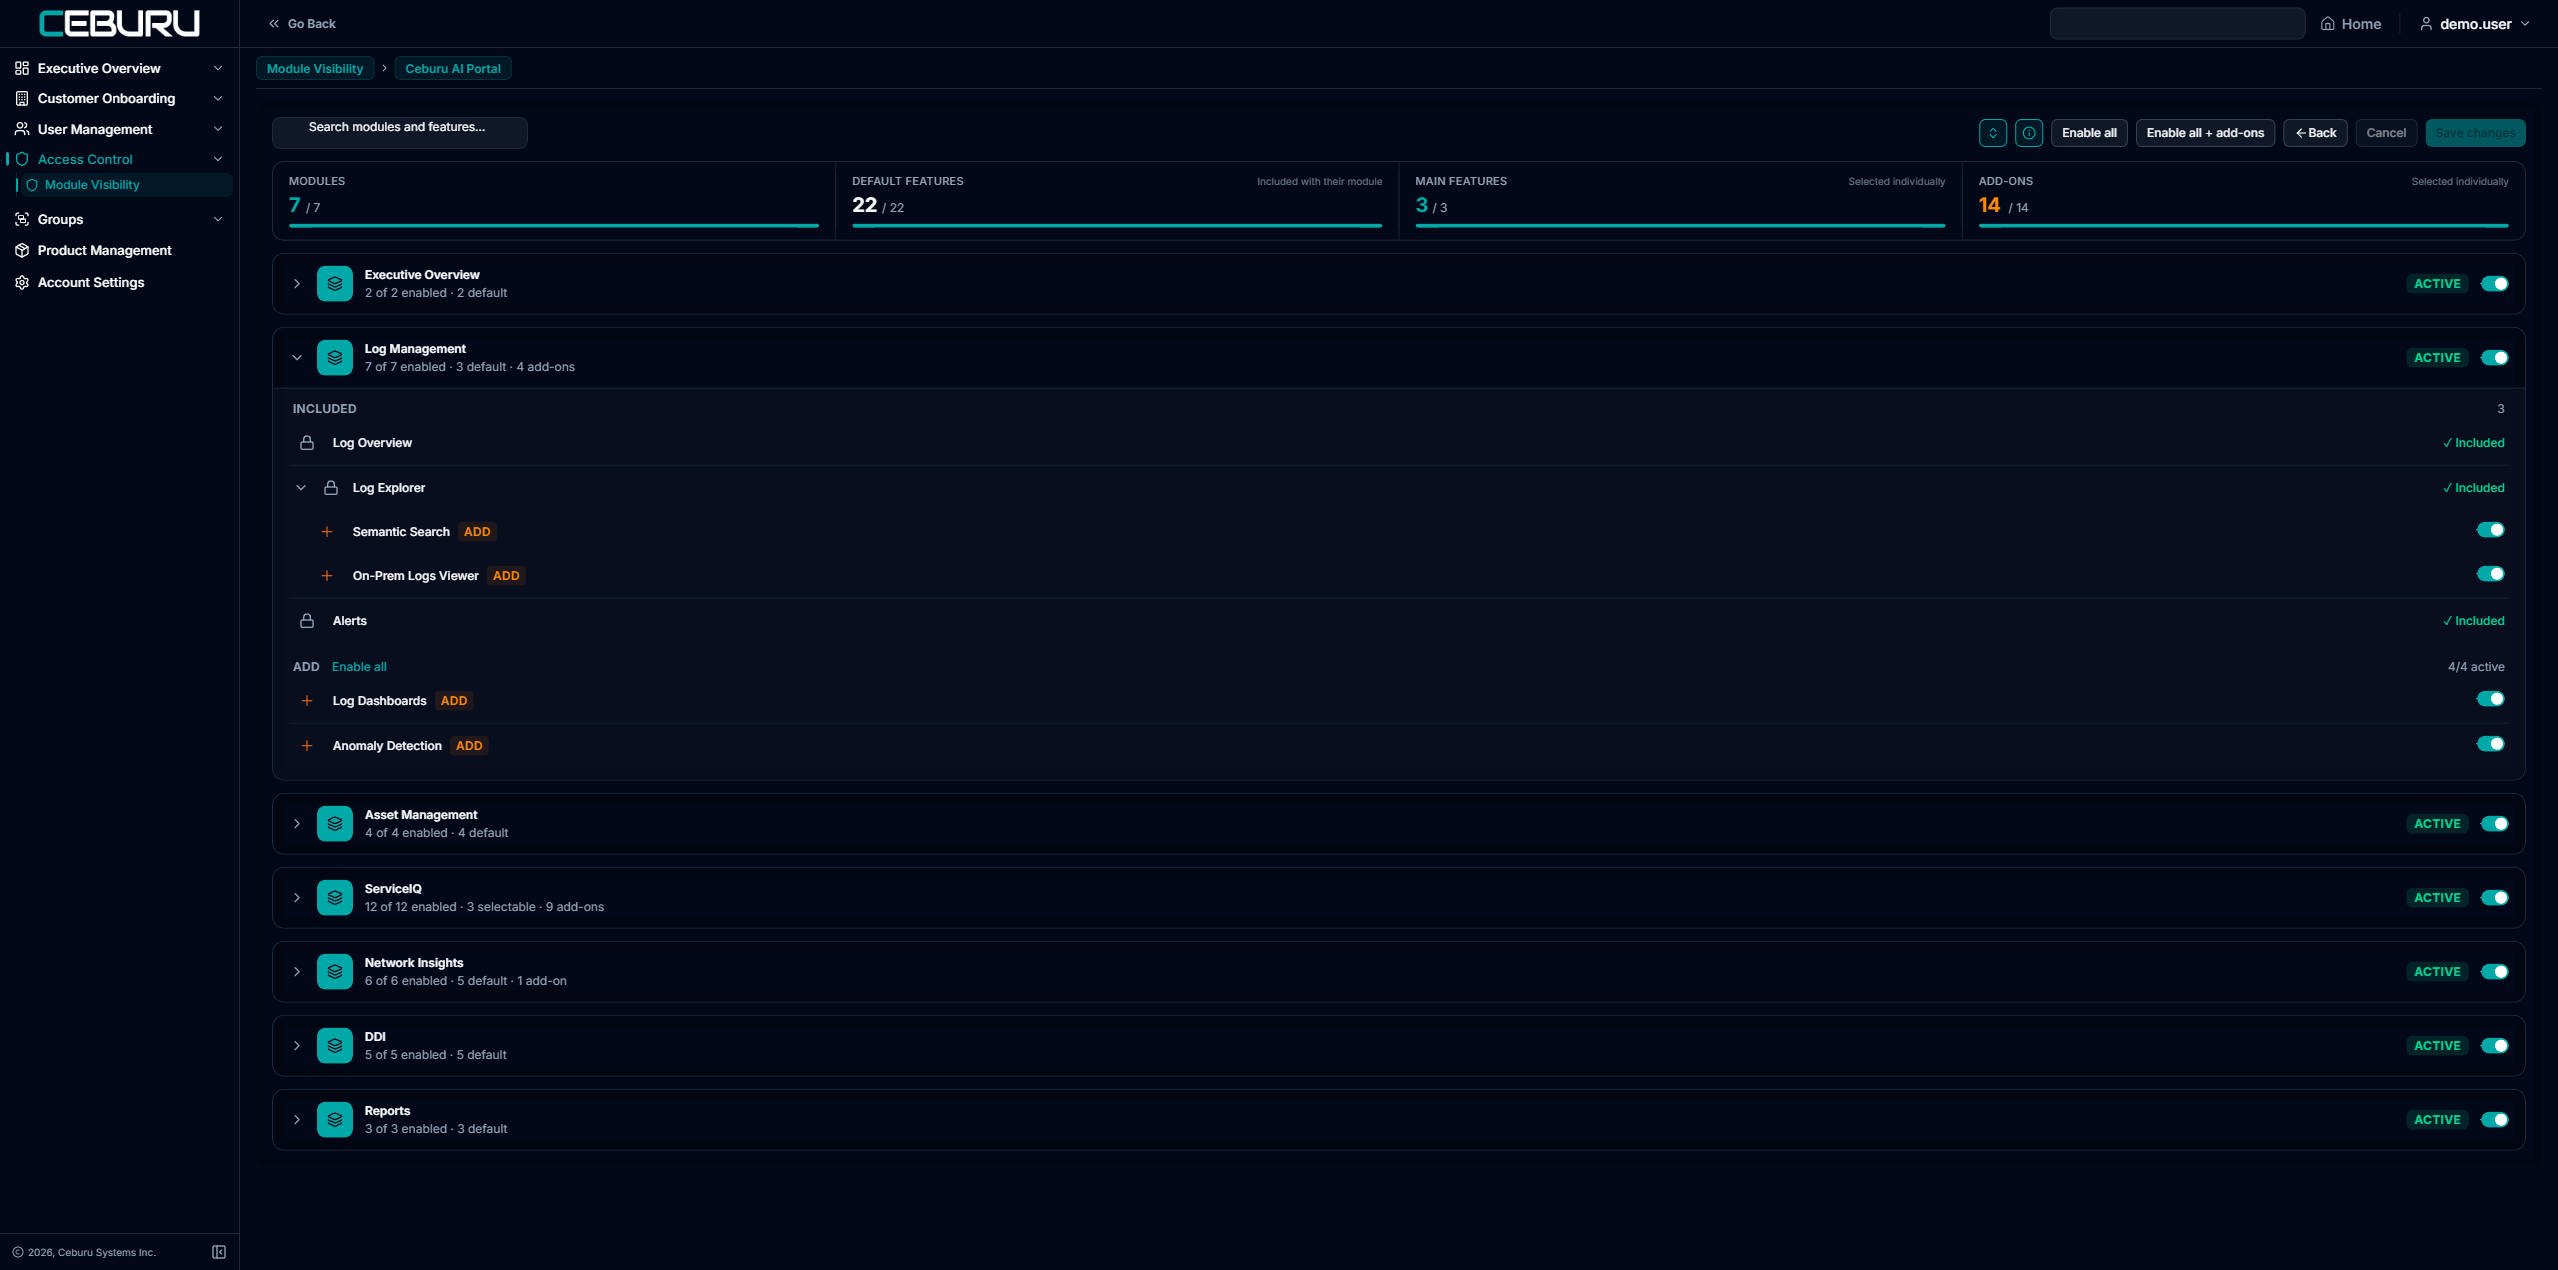
INCLUDED lists what comes with the module. Each is labelled “Included” and has no toggle. ADD lists the optional extras, with an Enable all shortcut and a count such as “4/4 active” on the right.
Some included features have their own add-ons nested underneath. Expanding Log Explorer reveals two more, each independently switchable.
| FEATURE | KIND | STATE |
|---|---|---|
| Log Overview | Included | Always on |
| Log Explorer | Included | Always on |
| — Semantic Search | ADD | ON |
| — On-Prem Logs Viewer | ADD | ON |
| Alerts | Included | Always on |
| Log Dashboards | ADD | ON |
| Anomaly Detection | ADD | ON |
5. Main features
Some modules are built from several main features rather than one fixed set. The header shows the rule that applies.
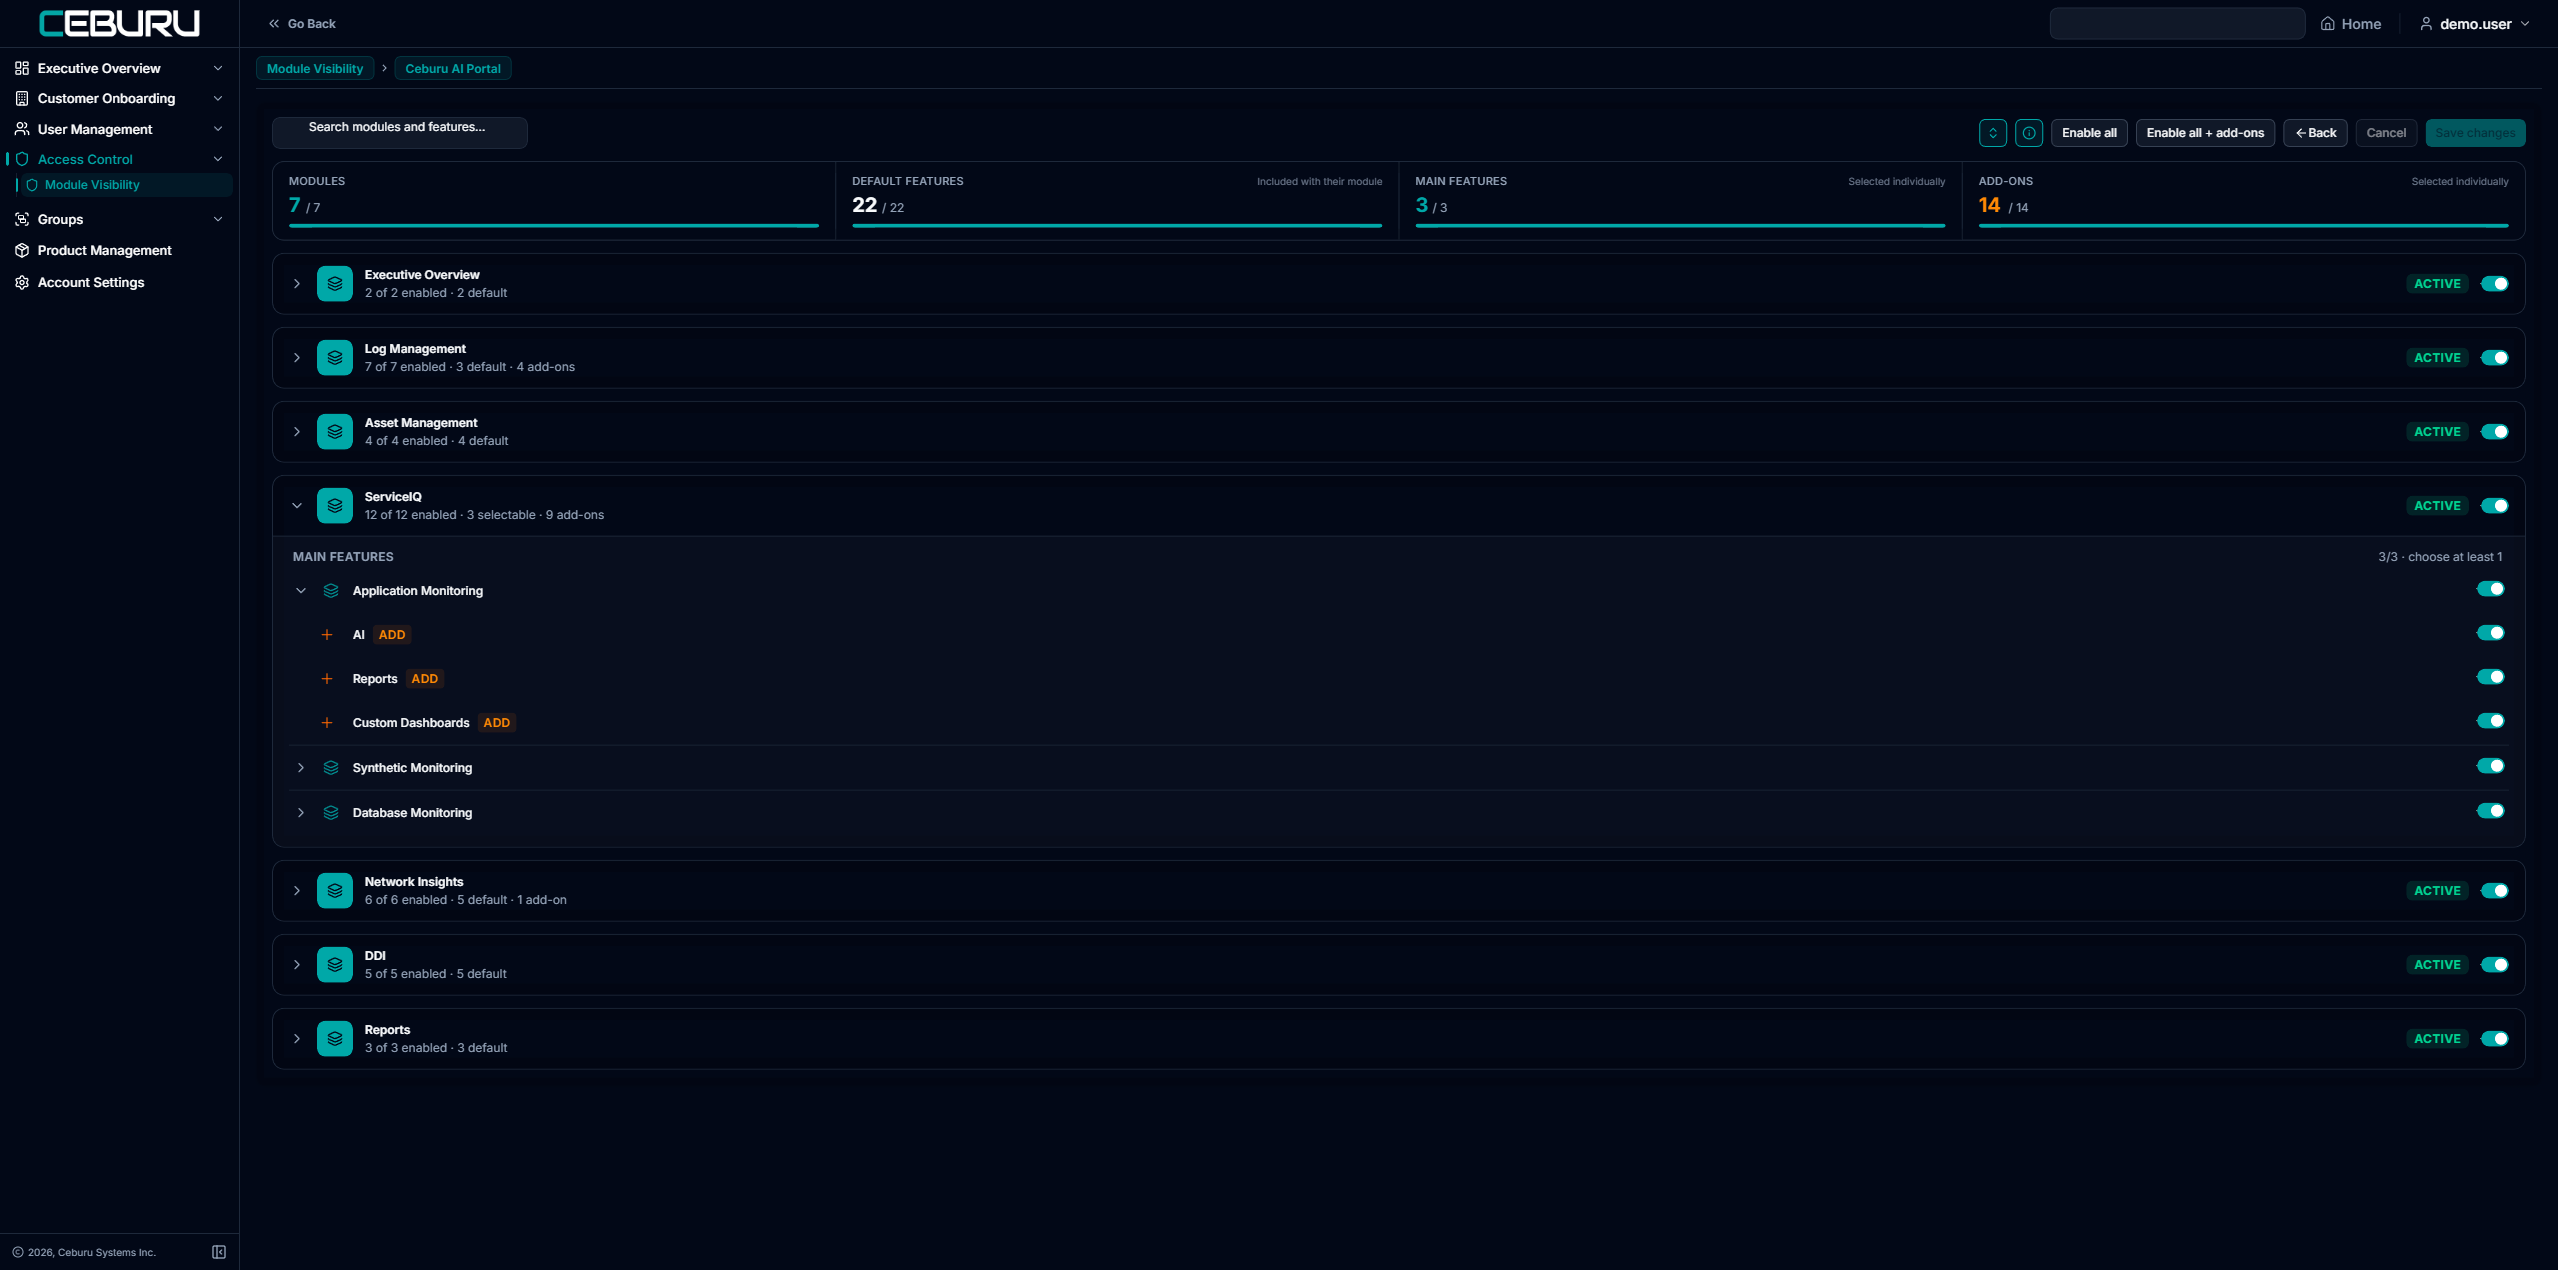
| MAIN FEATURES | 3/3 · choose at least 1 |
|---|---|
| Application Monitoring | ON |
| — AI ADD | ON |
| — Reports ADD | ON |
| — Custom Dashboards ADD | ON |
| Synthetic Monitoring | ON |
| Database Monitoring | ON |
“Choose at least 1” is enforced. If you switch off every main feature the module has nothing left to show, so the last one cannot be turned off. Switch off the module itself instead.
Main features can carry their own add-ons, shown nested when you expand them.
6. Making a change
- Confirm the customer in the top-right selector.
- Open the portal.
- Expand the module you want to change.
- Toggle the features. Included features follow their module and cannot be changed alone.
- Press Save changes.
To undo before saving, press Cancel.
7. Restricting features inside your own organisation
Module Visibility sets what a company is entitled to. It does not vary by person.
If you are a DSP, or you simply want some of your people to see less than the company is entitled to, use Groups › User Groups. A user group narrows access for the users in it.
The module picker offers exactly what Module Visibility has enabled for the company. Anything switched off there cannot be granted back by a group.
The user groups list
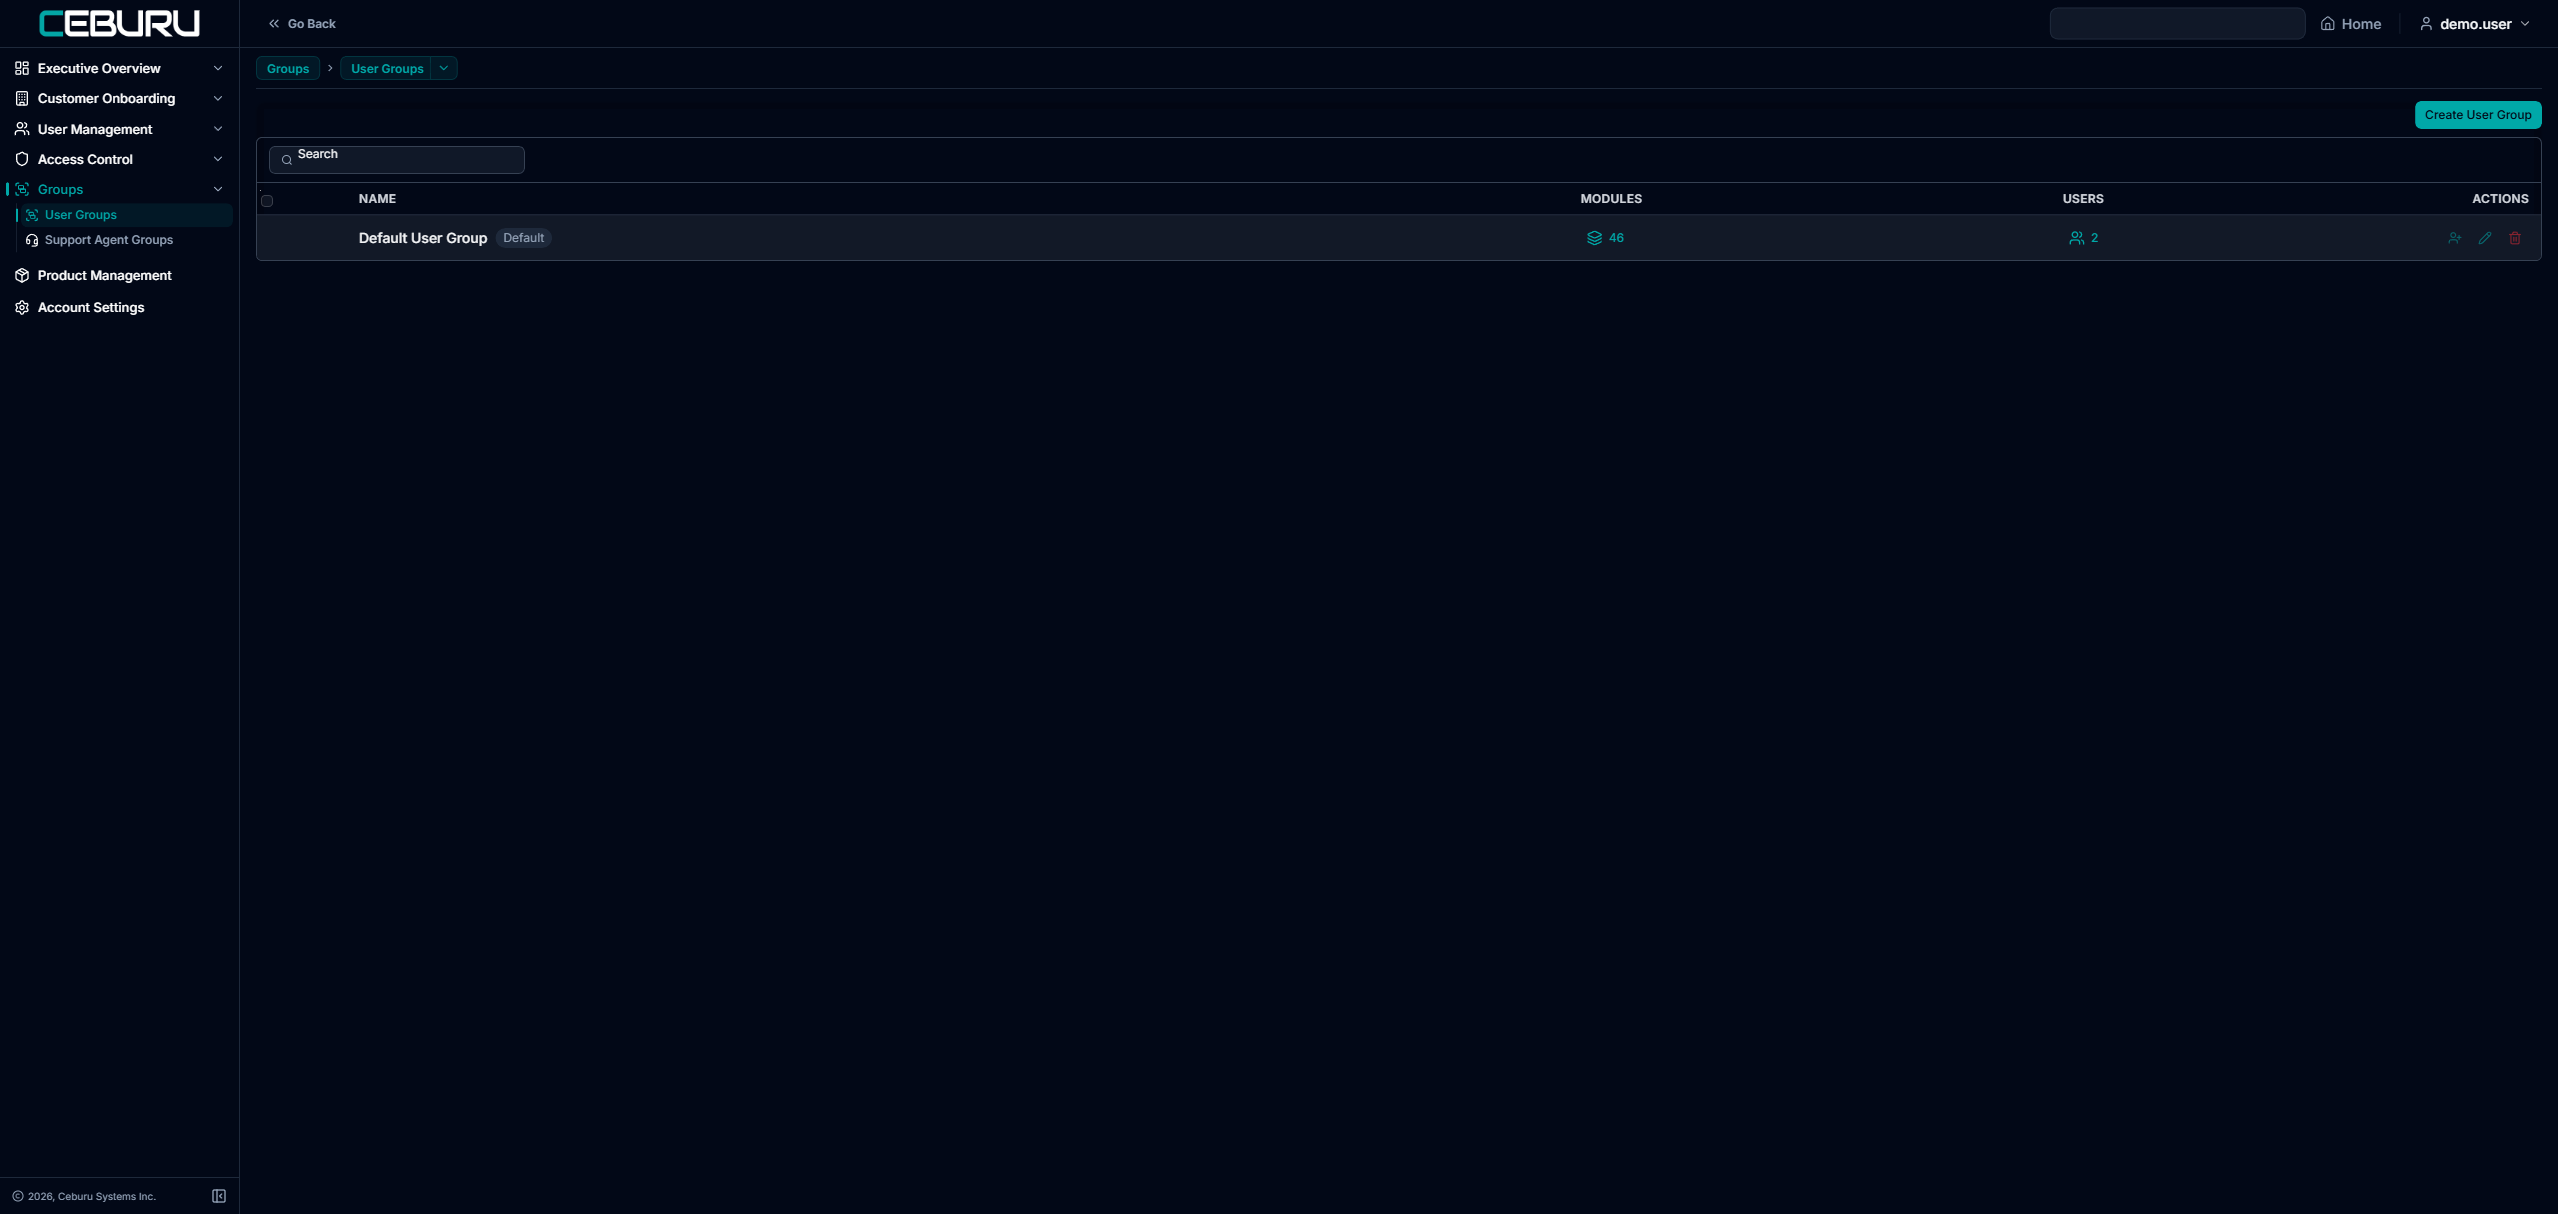
Each row shows the group name, how many modules it grants and how many users are in it. The row actions let you view the modules, view the users, assign users, edit or delete.
The Default User Group cannot be restricted
Every company has one. It cannot be deleted, admins are always members and cannot be removed, and it grants access to every module available to the company.
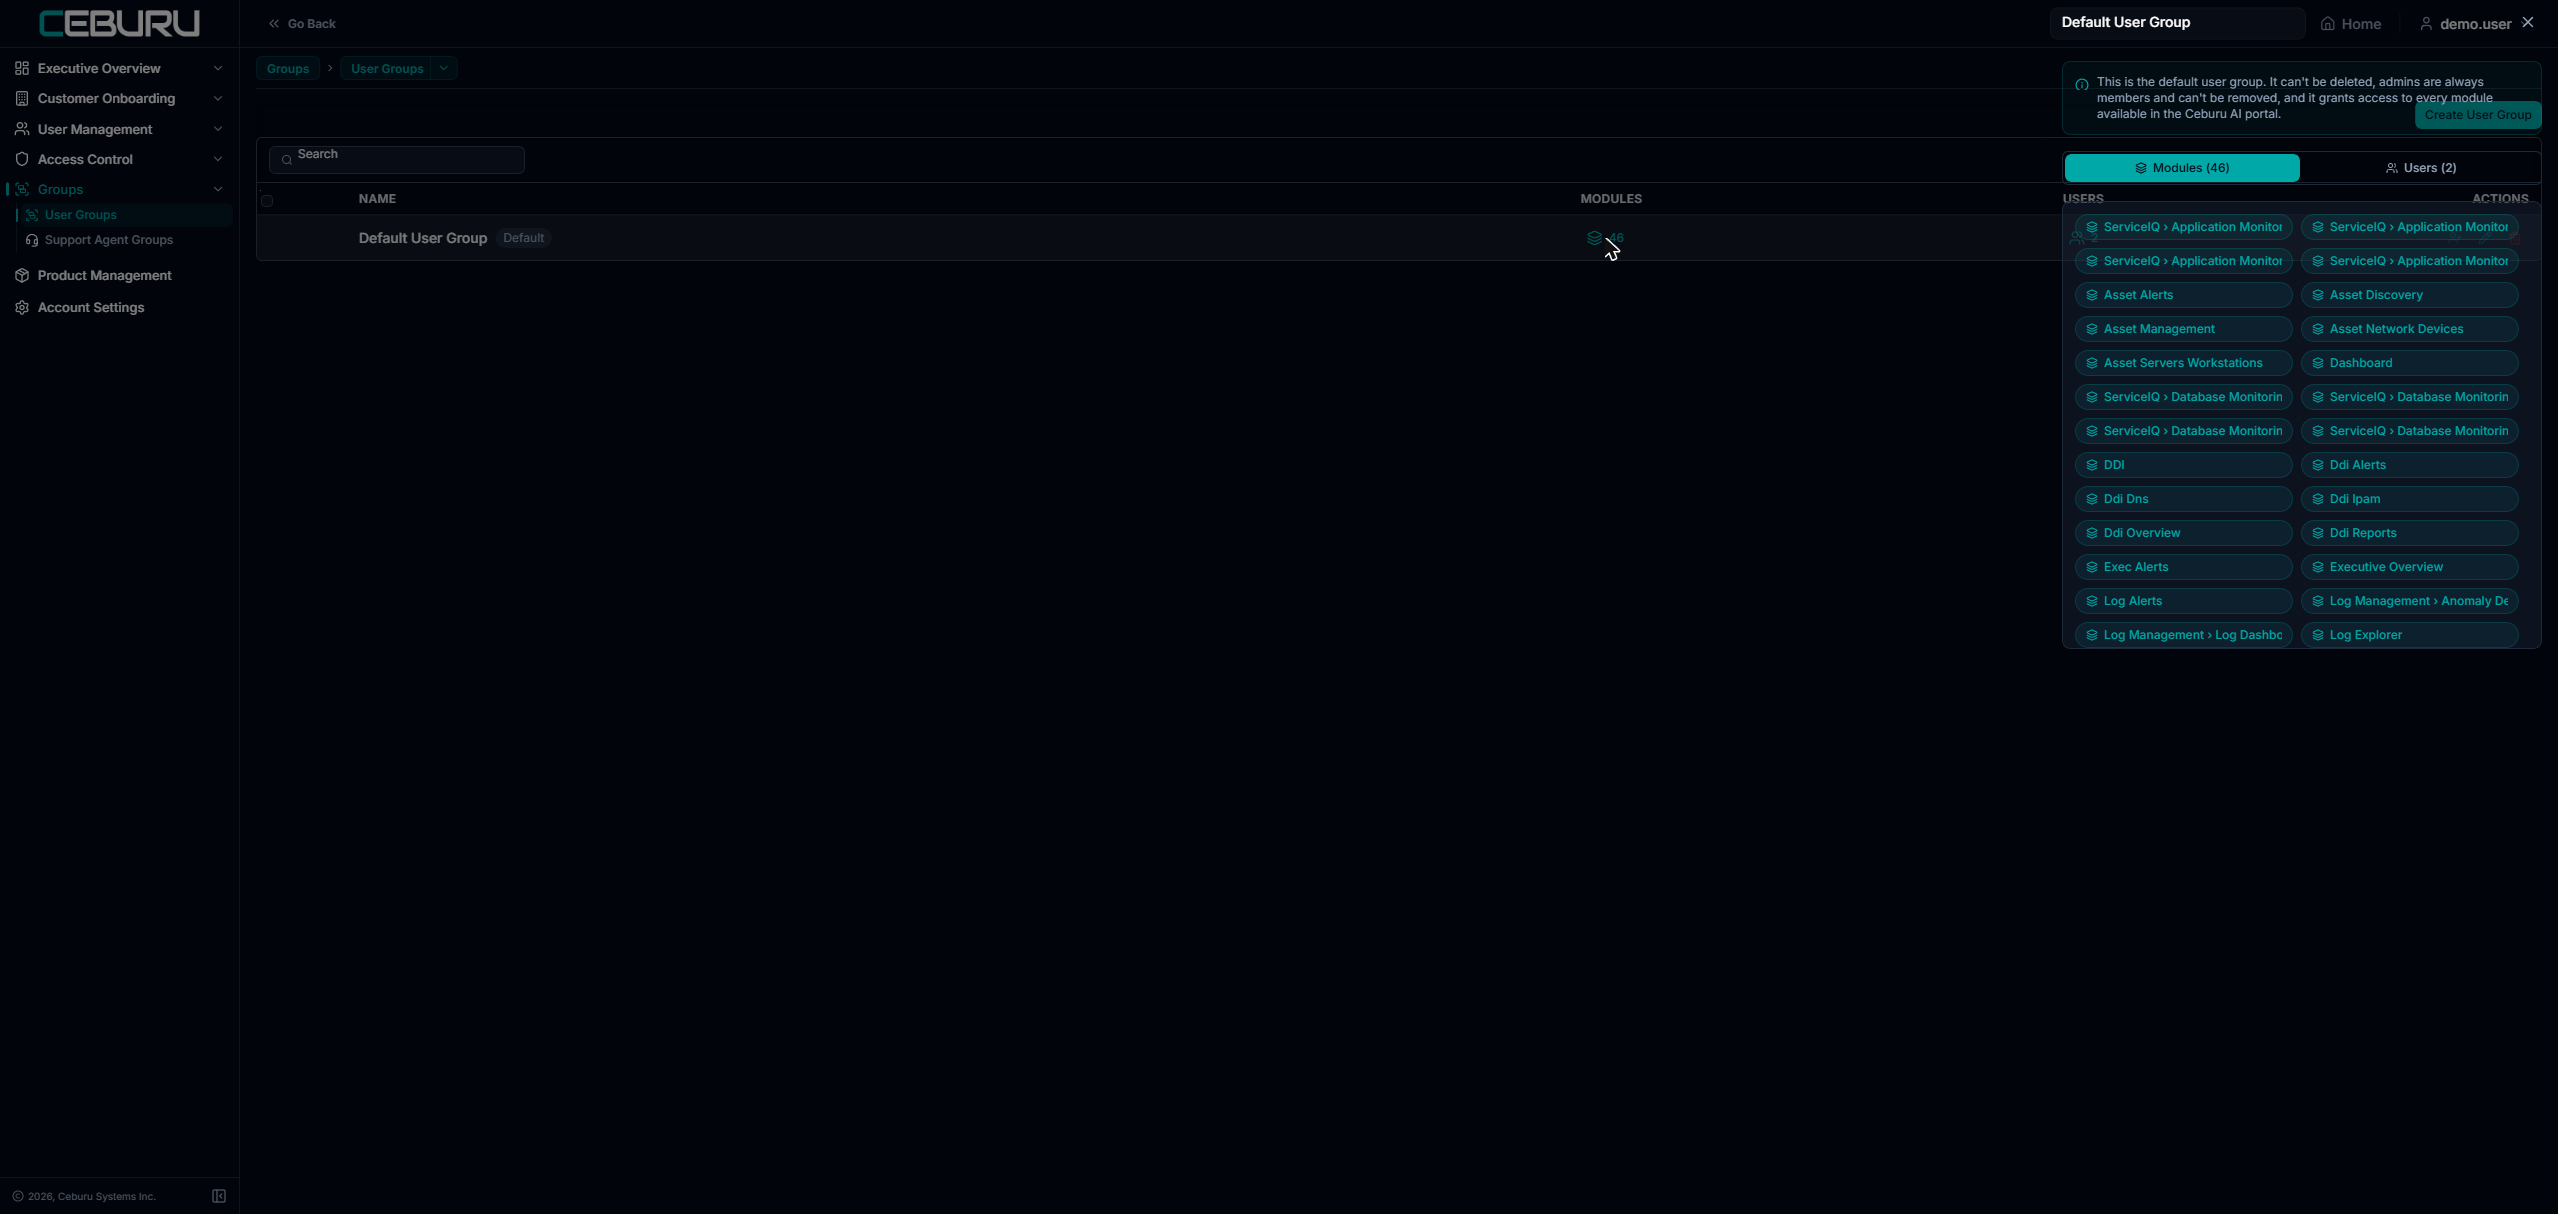
So restricting is not a matter of editing the default group. Create a new group with a smaller selection and move the relevant users into it.
Creating a restricted group
Press Create User Group and fill in three things.
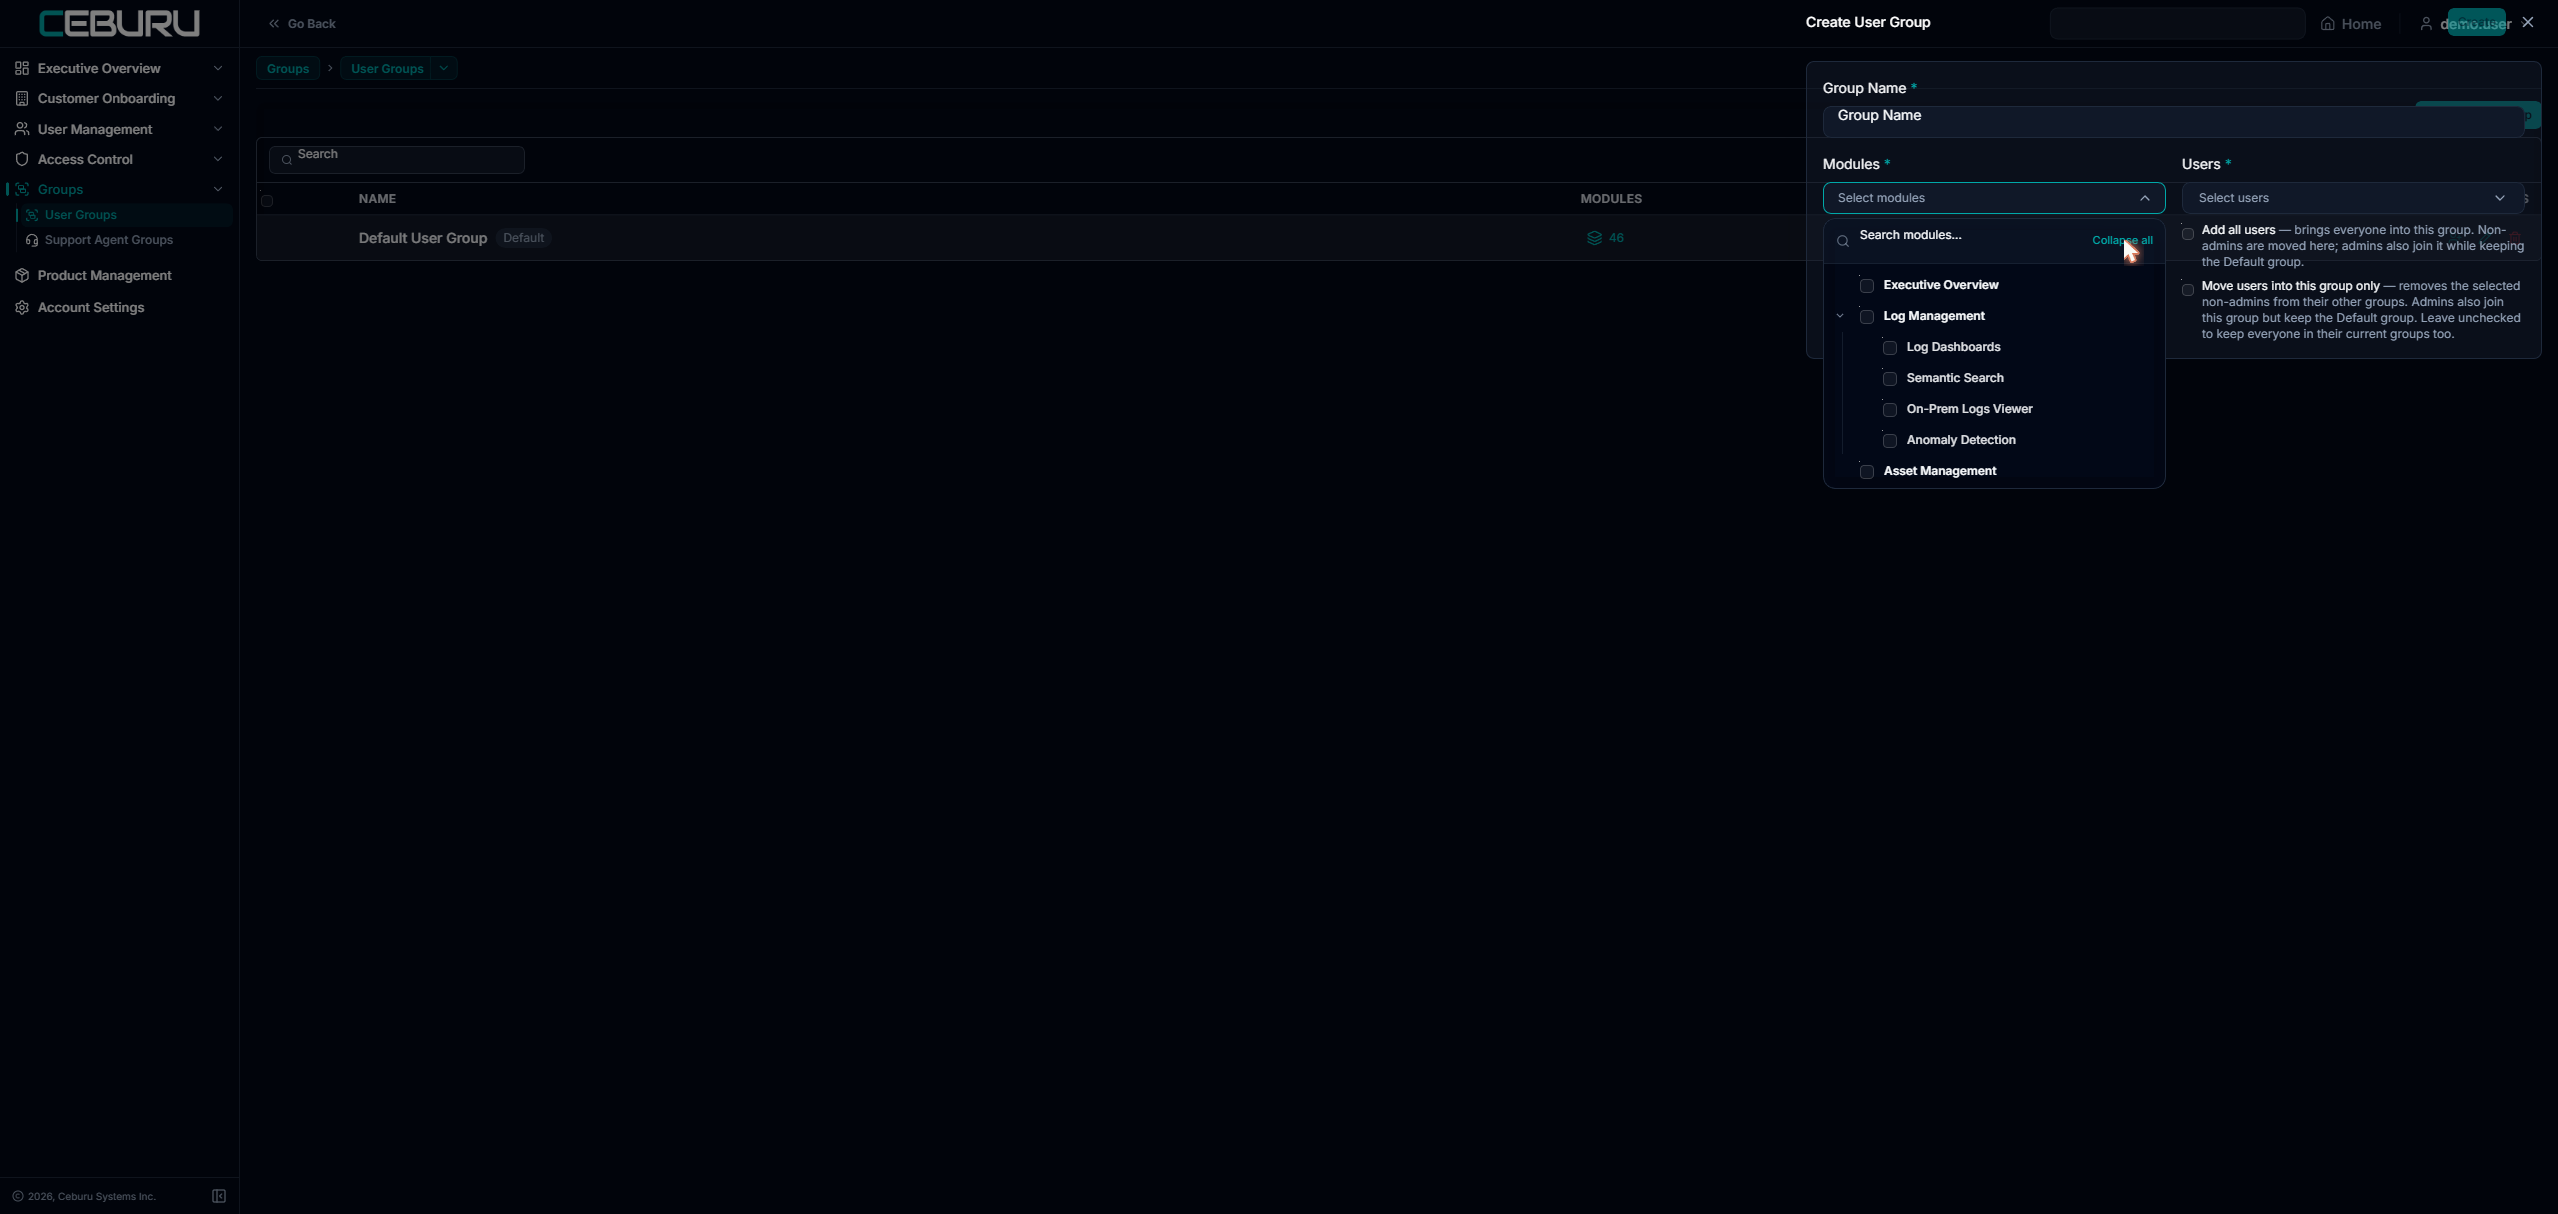
| Field | Notes |
|---|---|
| Group Name | Required. |
| Modules | Tick only what this group should see. Use Expand all to reveal add-ons nested under each module, each one separately checkable. |
| Users | Who belongs to the group. |
Selecting a feature includes its base screens automatically. Add-ons are listed separately underneath and can be unchecked individually.
Two options control how members are moved:
| Add all users | Brings everyone into this group. Non-admins are moved here; admins also join it while keeping the Default group. |
| Move users into this group only | Removes the selected non-admins from their other groups. Admins also join this group but keep the Default group. Leave it unchecked to keep everyone in their current groups too. |
How access adds up across groups
A user’s access is the sum of all the groups they belong to. If any one of their groups grants a feature, they can see it. Groups add access; they never subtract it.
Removing it from one group changes nothing while another group still grants it.
Before assuming a restriction has worked, check which groups the person is actually in.
Two cases override group restrictions entirely:
| Case | Effect |
|---|---|
| The user is in the Default User Group | They see everything the company is entitled to, whatever their other groups say. Remove them from the Default group first, or the restriction has no effect. |
| The user is a platform operator | Group restrictions do not apply to them at all. |
A user in no groups at all also sees everything the company is entitled to. Restriction comes from being in a narrower group, not from having no group.
Which one should I change?
| Goal | Use |
|---|---|
| The company should not have the feature at all | Module Visibility |
| The company keeps it, but only some staff should see it | User Groups |
Module Visibility is the ceiling. User groups divide up what is underneath it.
Was this article helpful?
That’s Great!
Thank you for your feedback
Sorry! We couldn't be helpful
Thank you for your feedback
Feedback sent
We appreciate your effort and will try to fix the article