Network Insights provides two major capabilities:
NetMap - Network discovery and topology mapping
NetPath - Path and connectivity analysis
Both require installation components inside the customer network environment.
Access path: Settings → Configurations → Network Insights
Note: We require two internal network ports - one for probe connectivity and one for Network Insights.
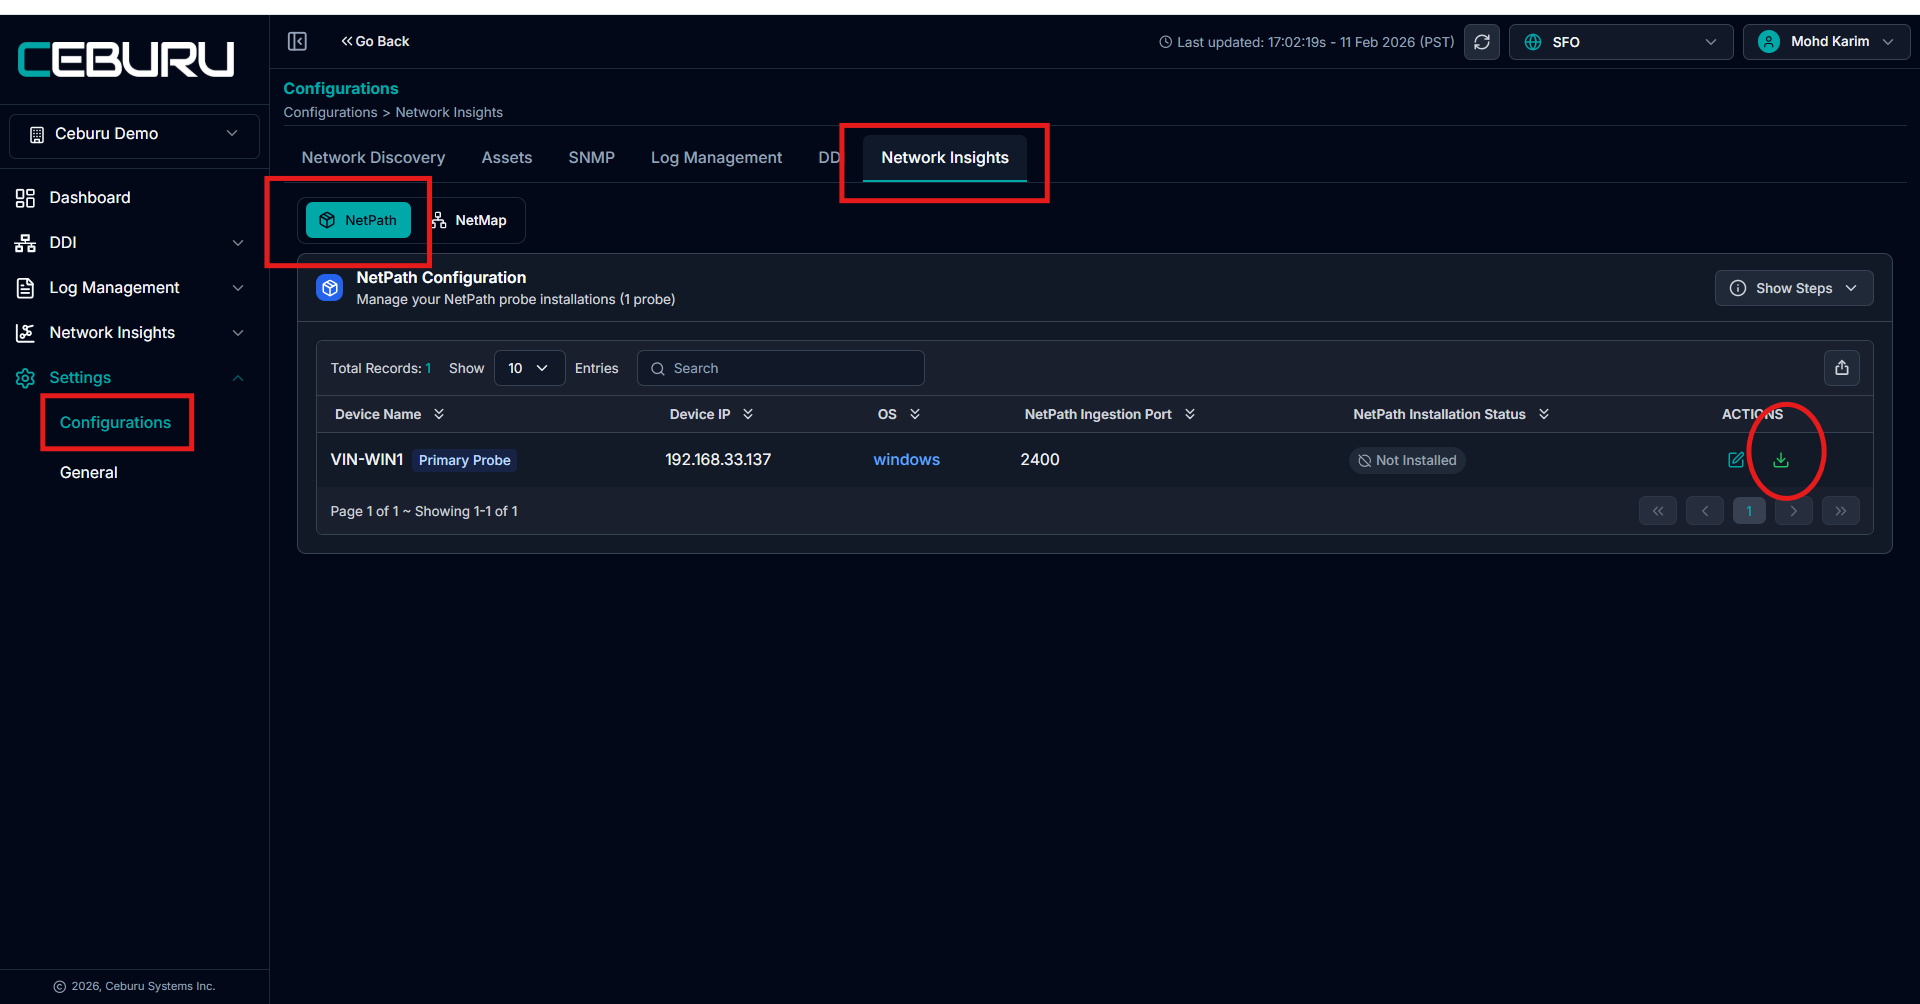
NetPath Installation Steps
NetPath is installed on a Probe system inside the customer network.
Navigate to: Settings → Configurations → Network Insights
- Select NetPath
- Download the NetPath installer
- Install it on the designated Probe machine
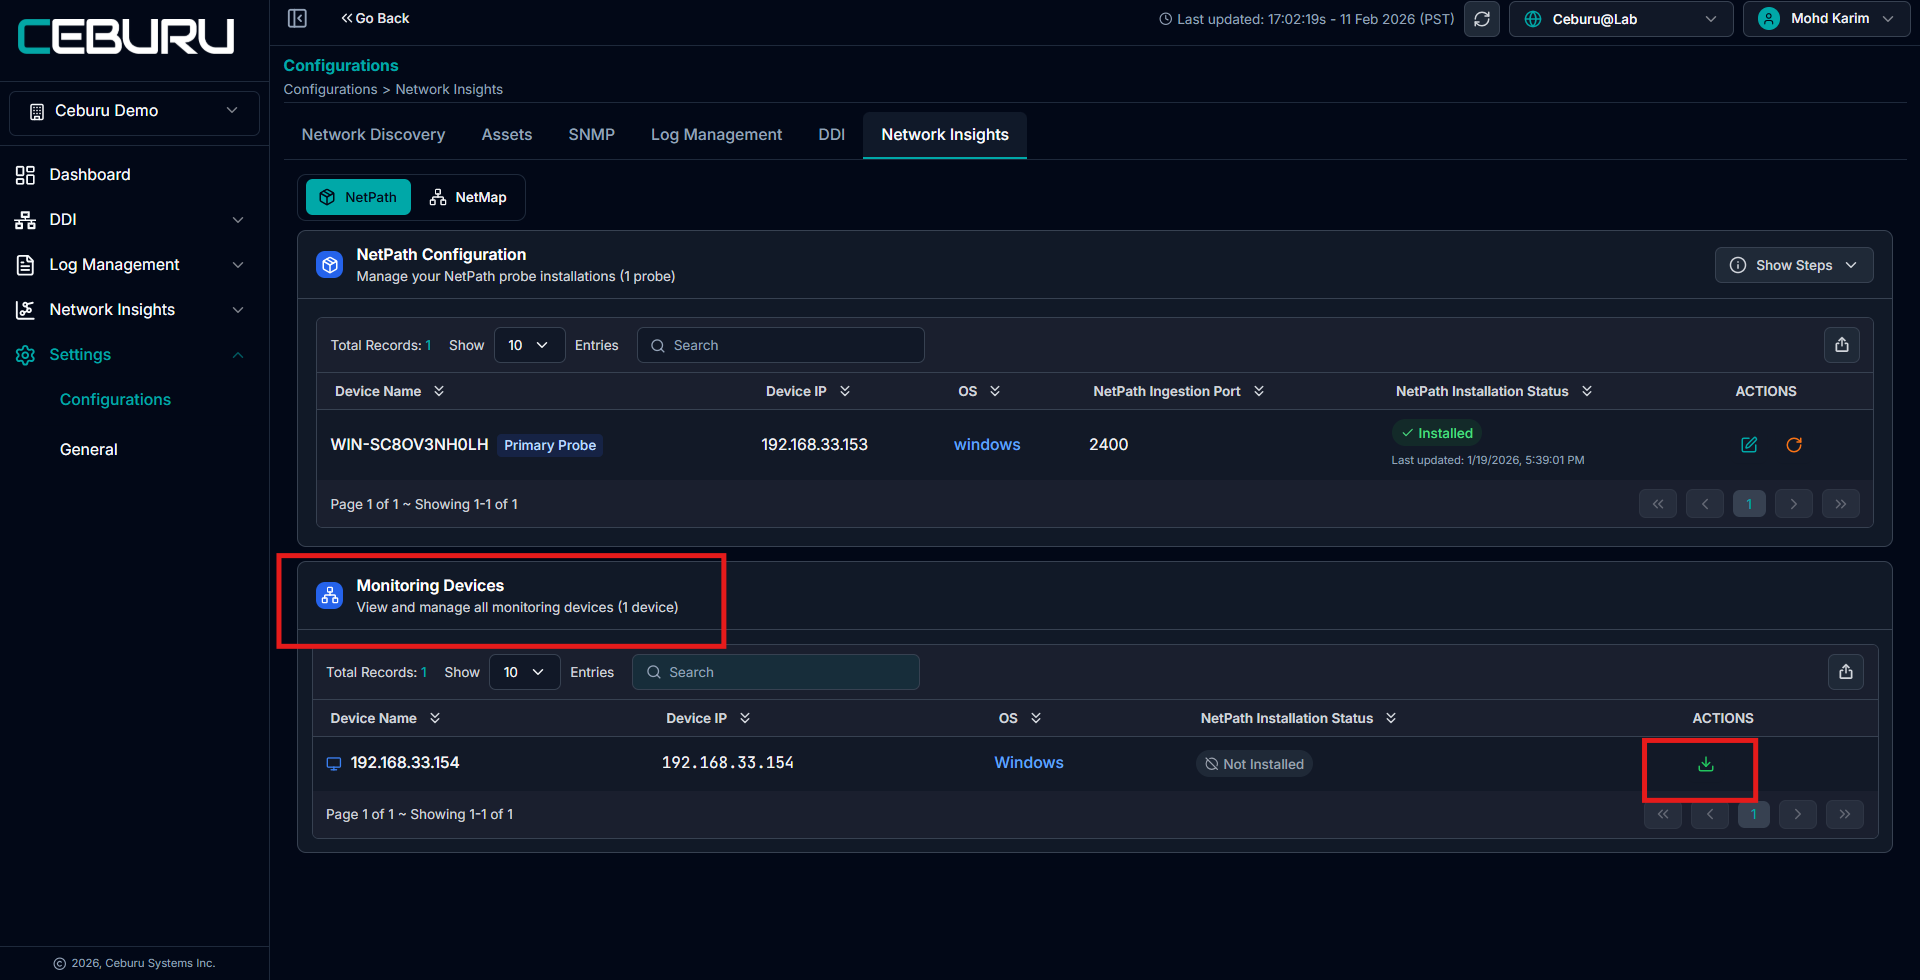
Once installed, the system appears under NetPath Configuration and becomes available for path monitoring tasks.

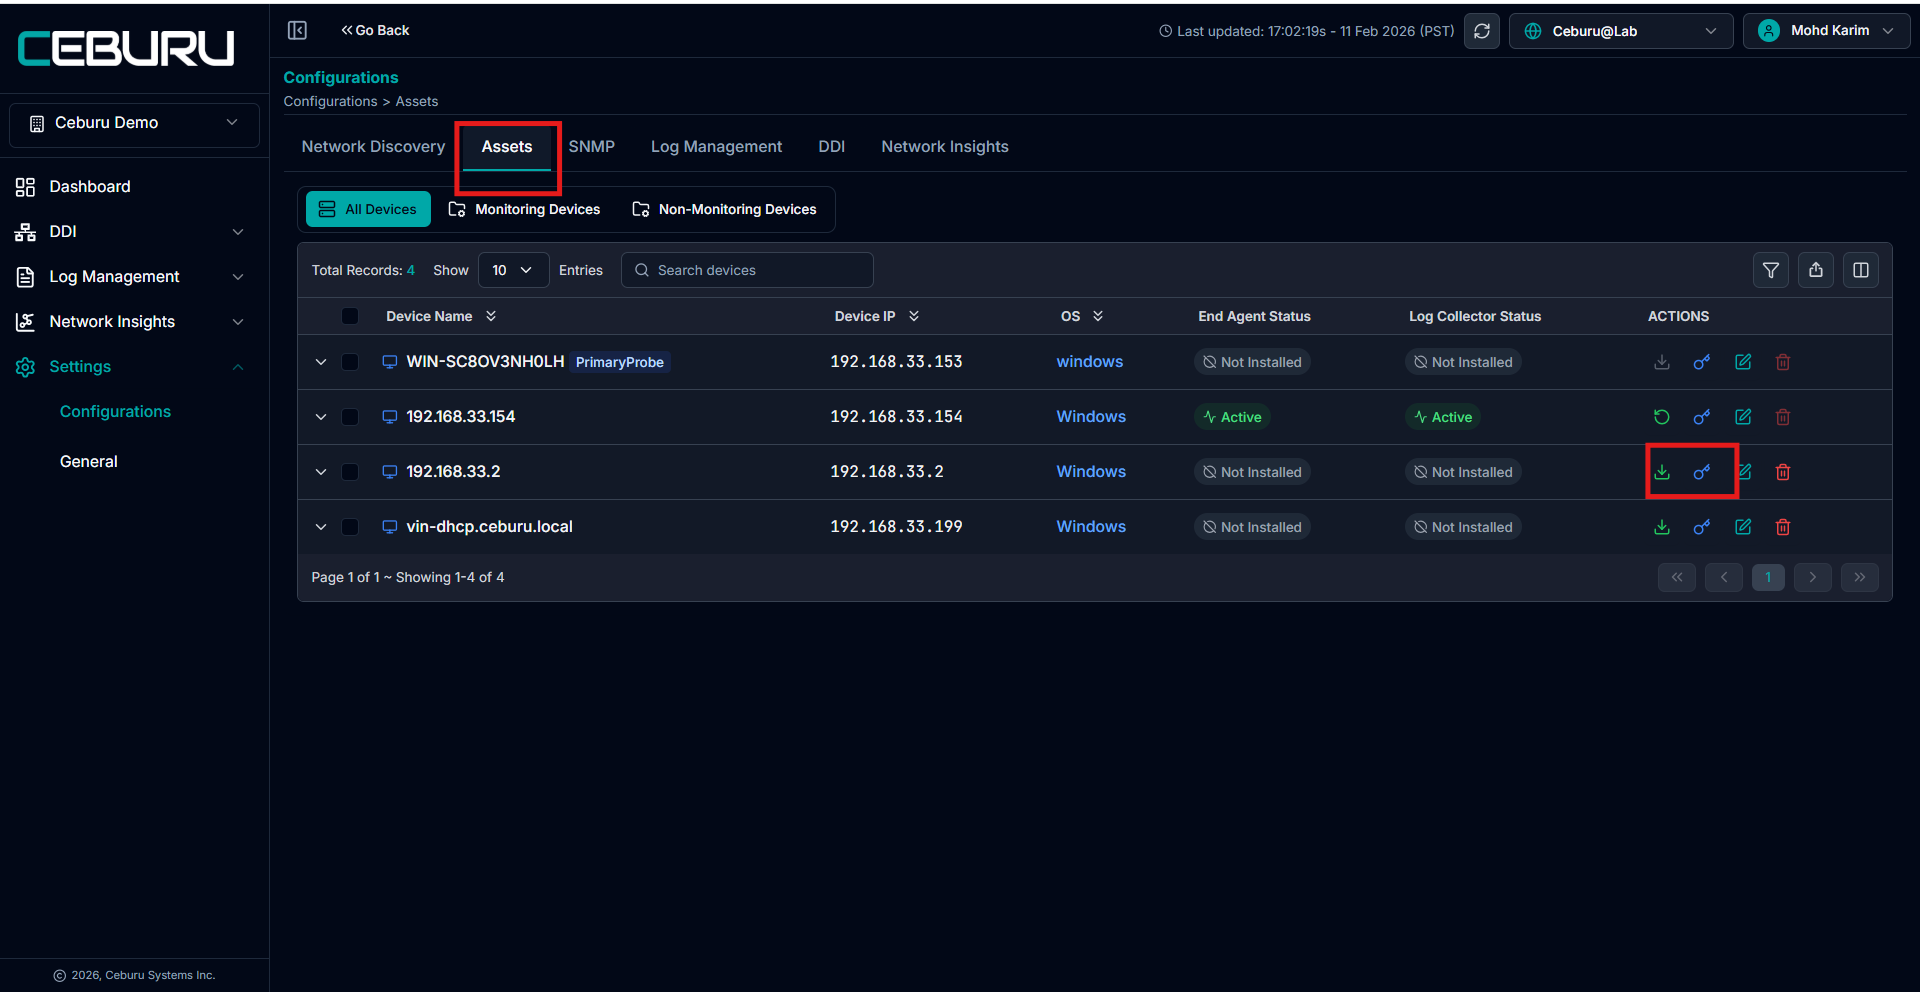
NetPath End Agent Installation:
To perform path analysis from specific devices, the device must:
Be added under Assets
Have the Ceburu End Agent installed
NetPath cannot run from devices that do not have the Ceburu End Agent installed.
Step 1: Add Device to Assets
Navigate to: Settings → Assets
The device must be successfully registered before installing the End Agent.
Step 2: Install Ceburu End Agent
The End Agent can be installed using either of the following methods:
Option 1 - Install from Portal
Go to the device under Assets
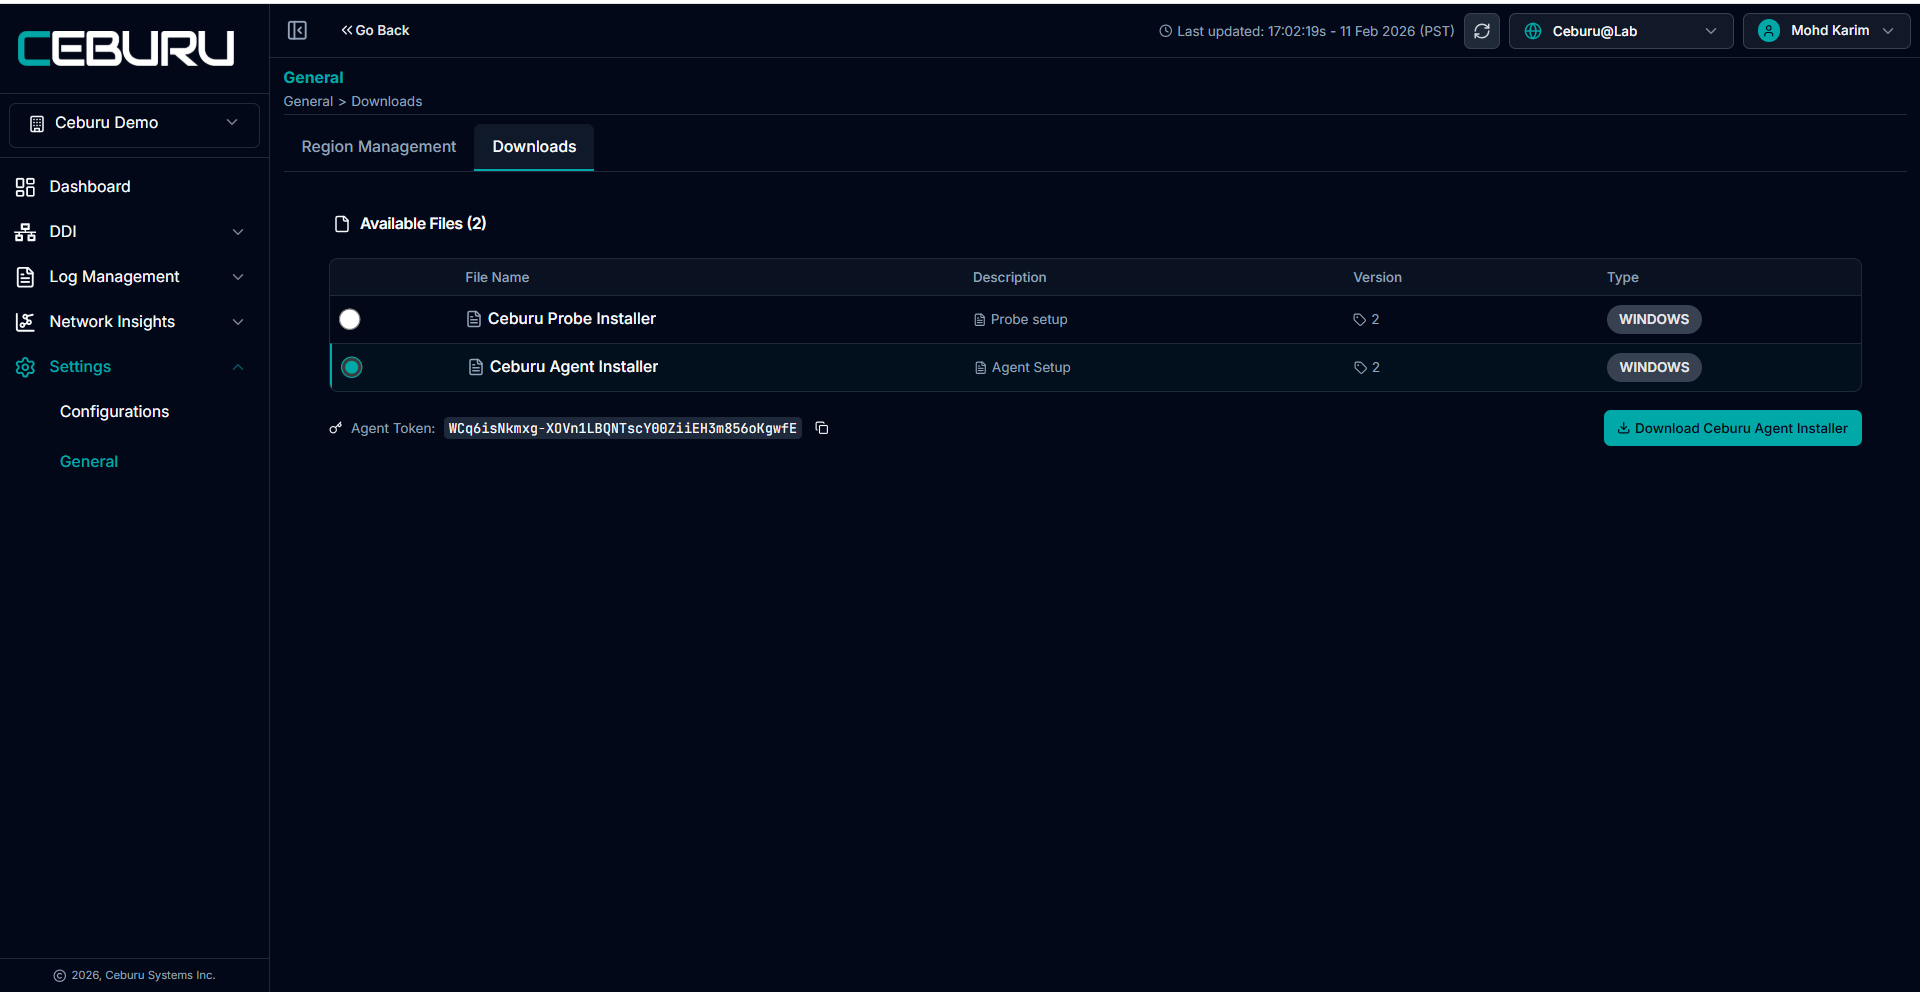
Download the Ceburu End Agent installer
Run the installer on the target device
The agent registers automatically with the portal
Option 2 - Install via NSIS Package
Use the NSIS generated installer
Deploy manually or through centralized deployment tools
Once installed, the agent registers with the platform
After installing the end agent the device will Appears in NetPath Monitoring devices
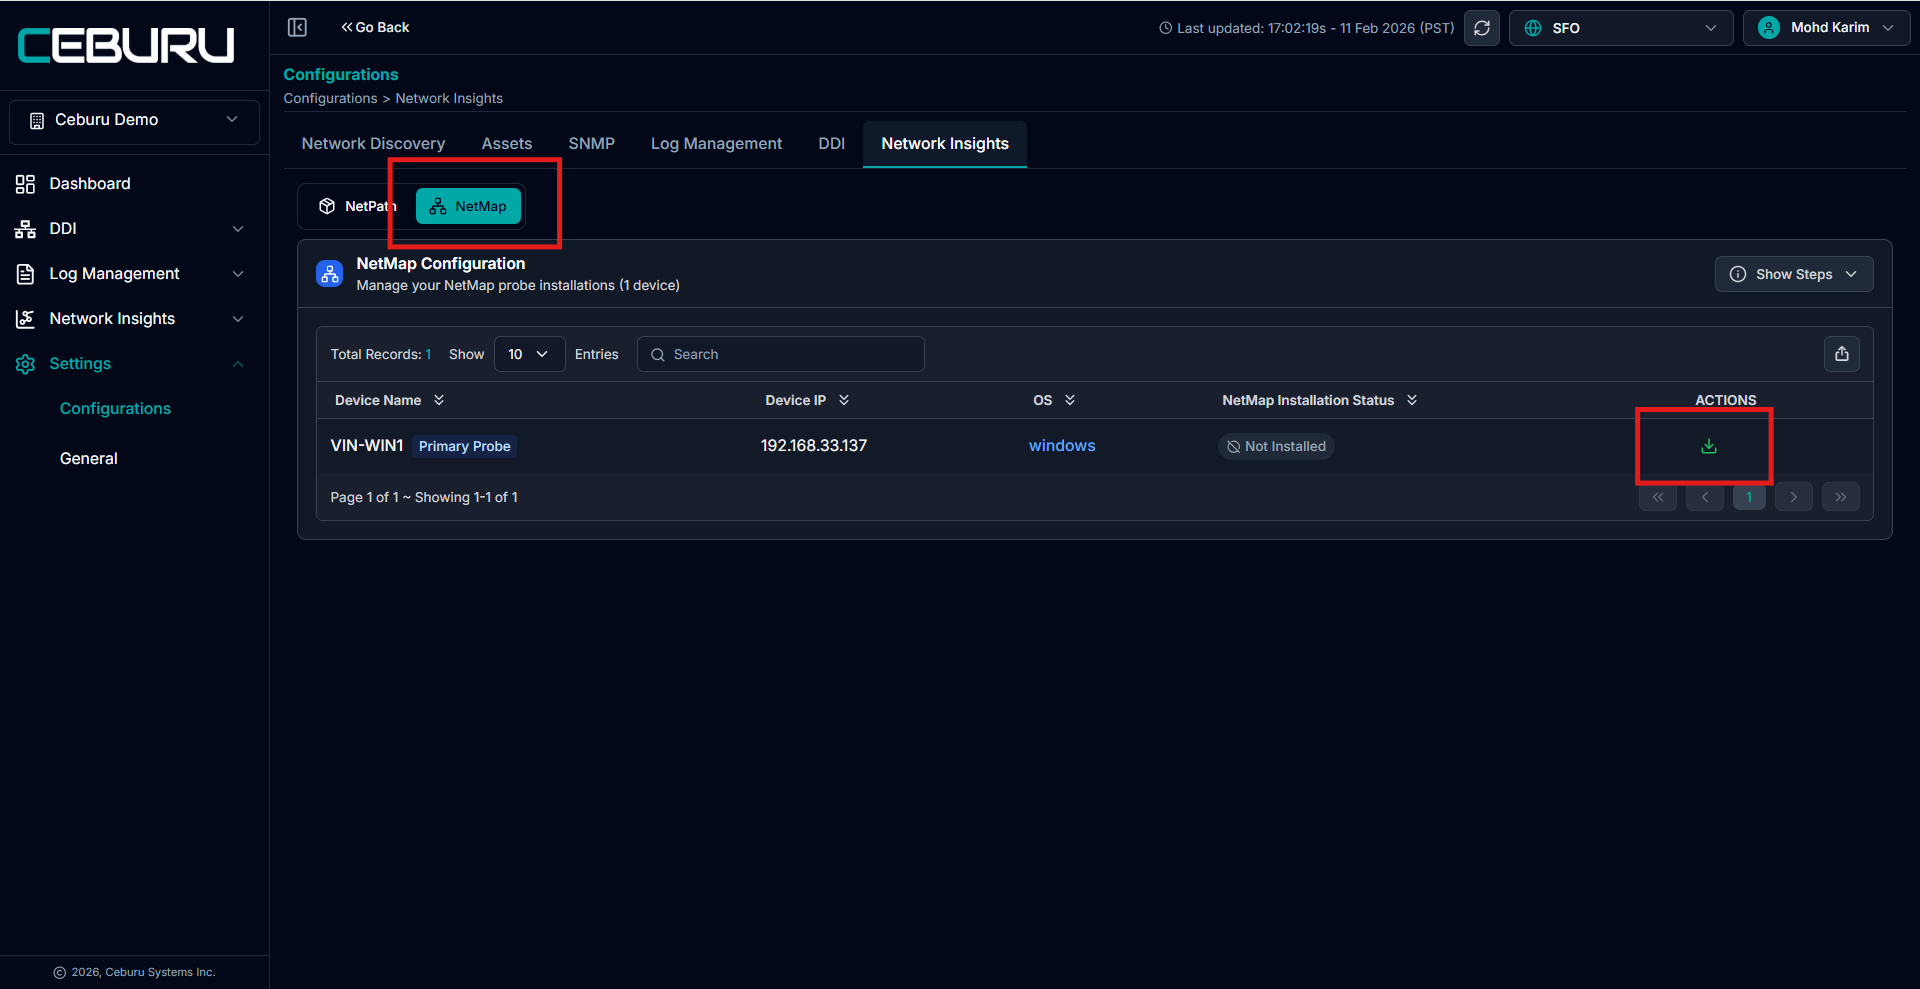
NetMap Installation Steps:
Navigate to: Settings → Configurations → Network Insights
Select NetMap
Download the NetMap executable
Install the executable on the Probe system
Once installed, scanning can be initiated from Network Insights
Note: NetMap must be installed on a Probe system inside the customer network.
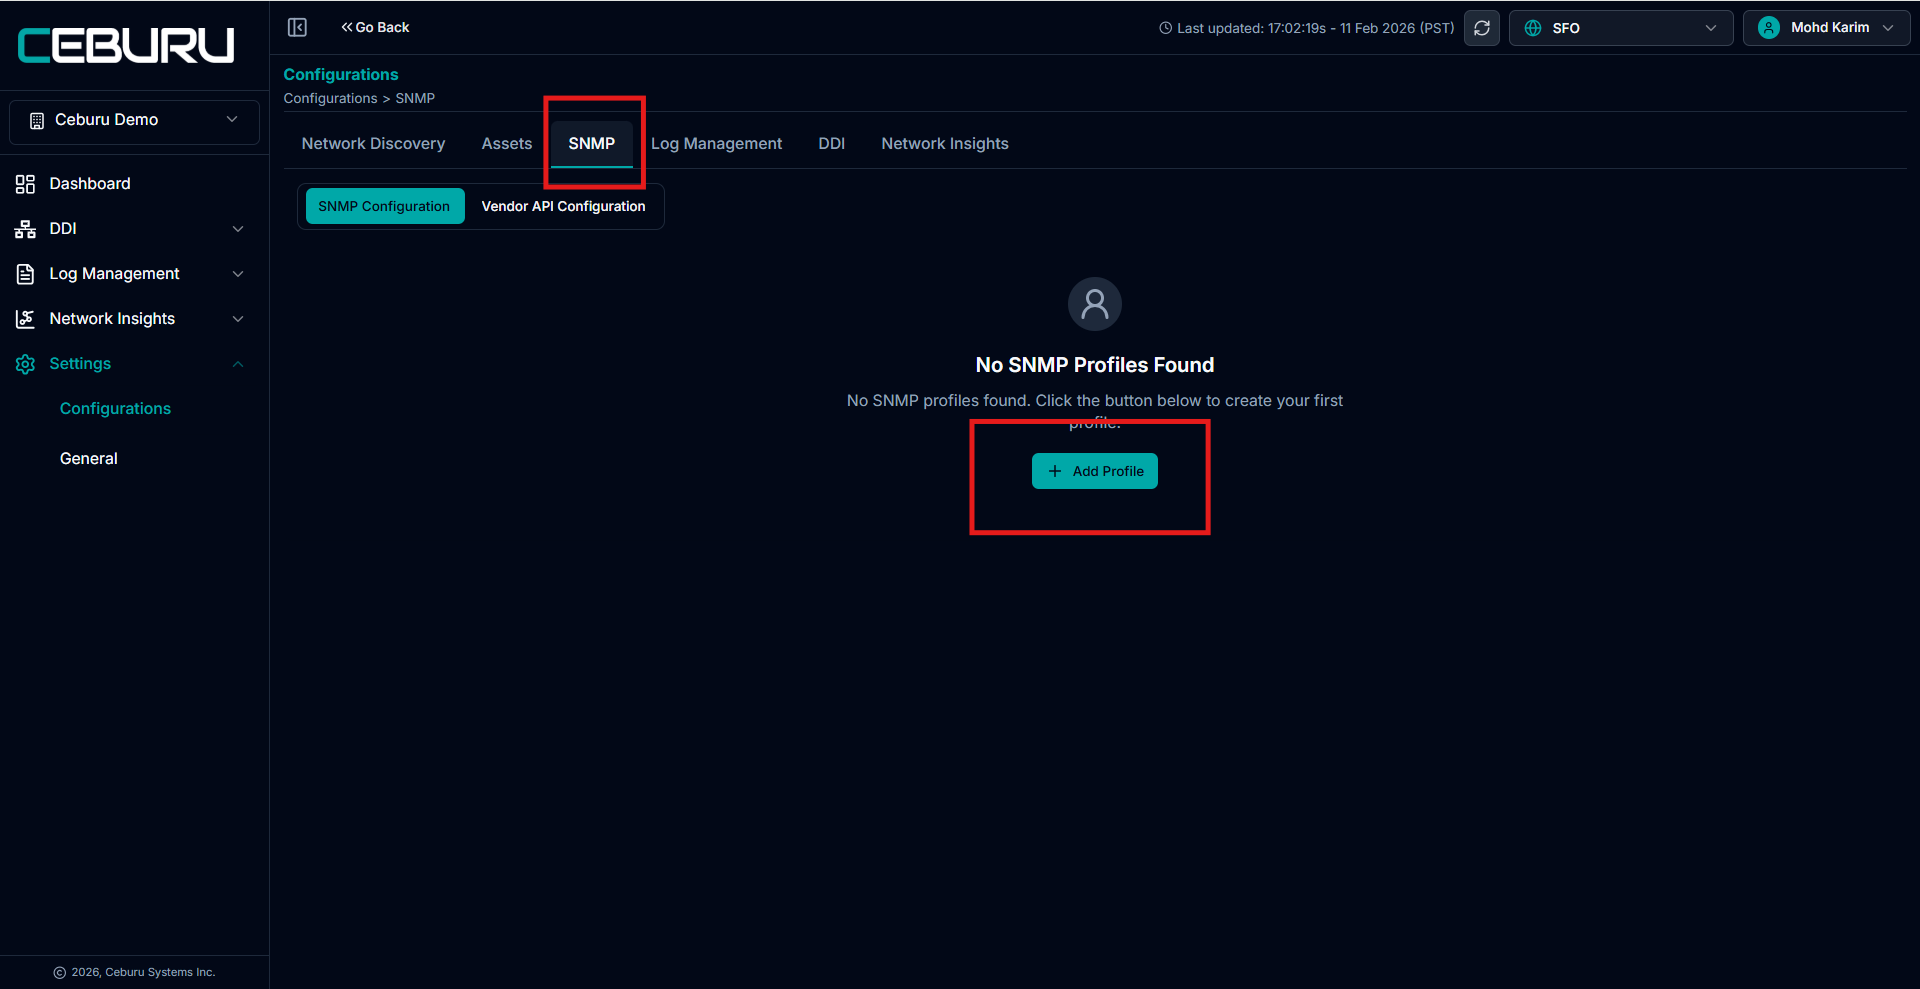
NetMap Configuration with SNMP/ Vendor API
Option 1 - SNMP Configuration
Used for direct device communication.
Path:
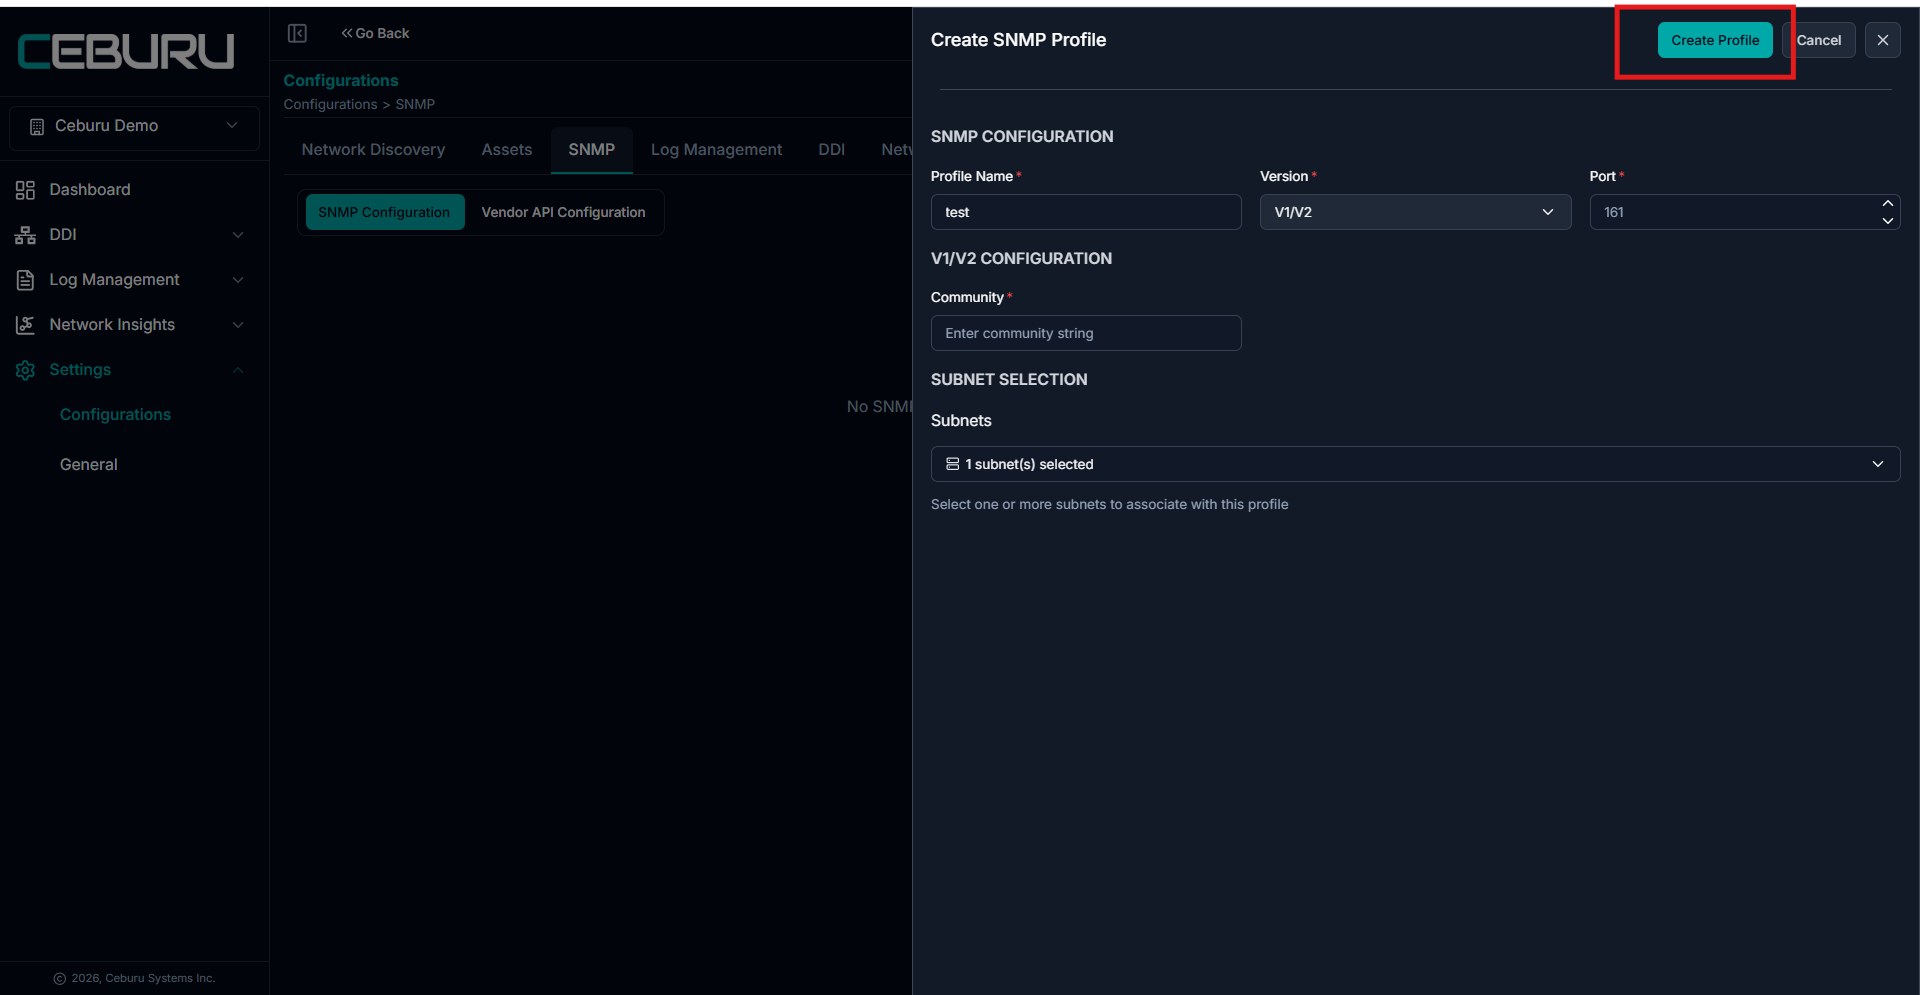
Settings → Configurations → SNMP
Steps:
Click Add Profile
Provide:
Profile Name
SNMP Version (v1/v2)
Port (default 161)
Community String
Select applicable subnets
Click Create Profile
Requirements:
Devices must allow SNMP access
Devices must be reachable from the Probe
SNMP must be enabled on devices
SNMP scans collect:
Device inventory
Interface data
Topology information
Low-level network details
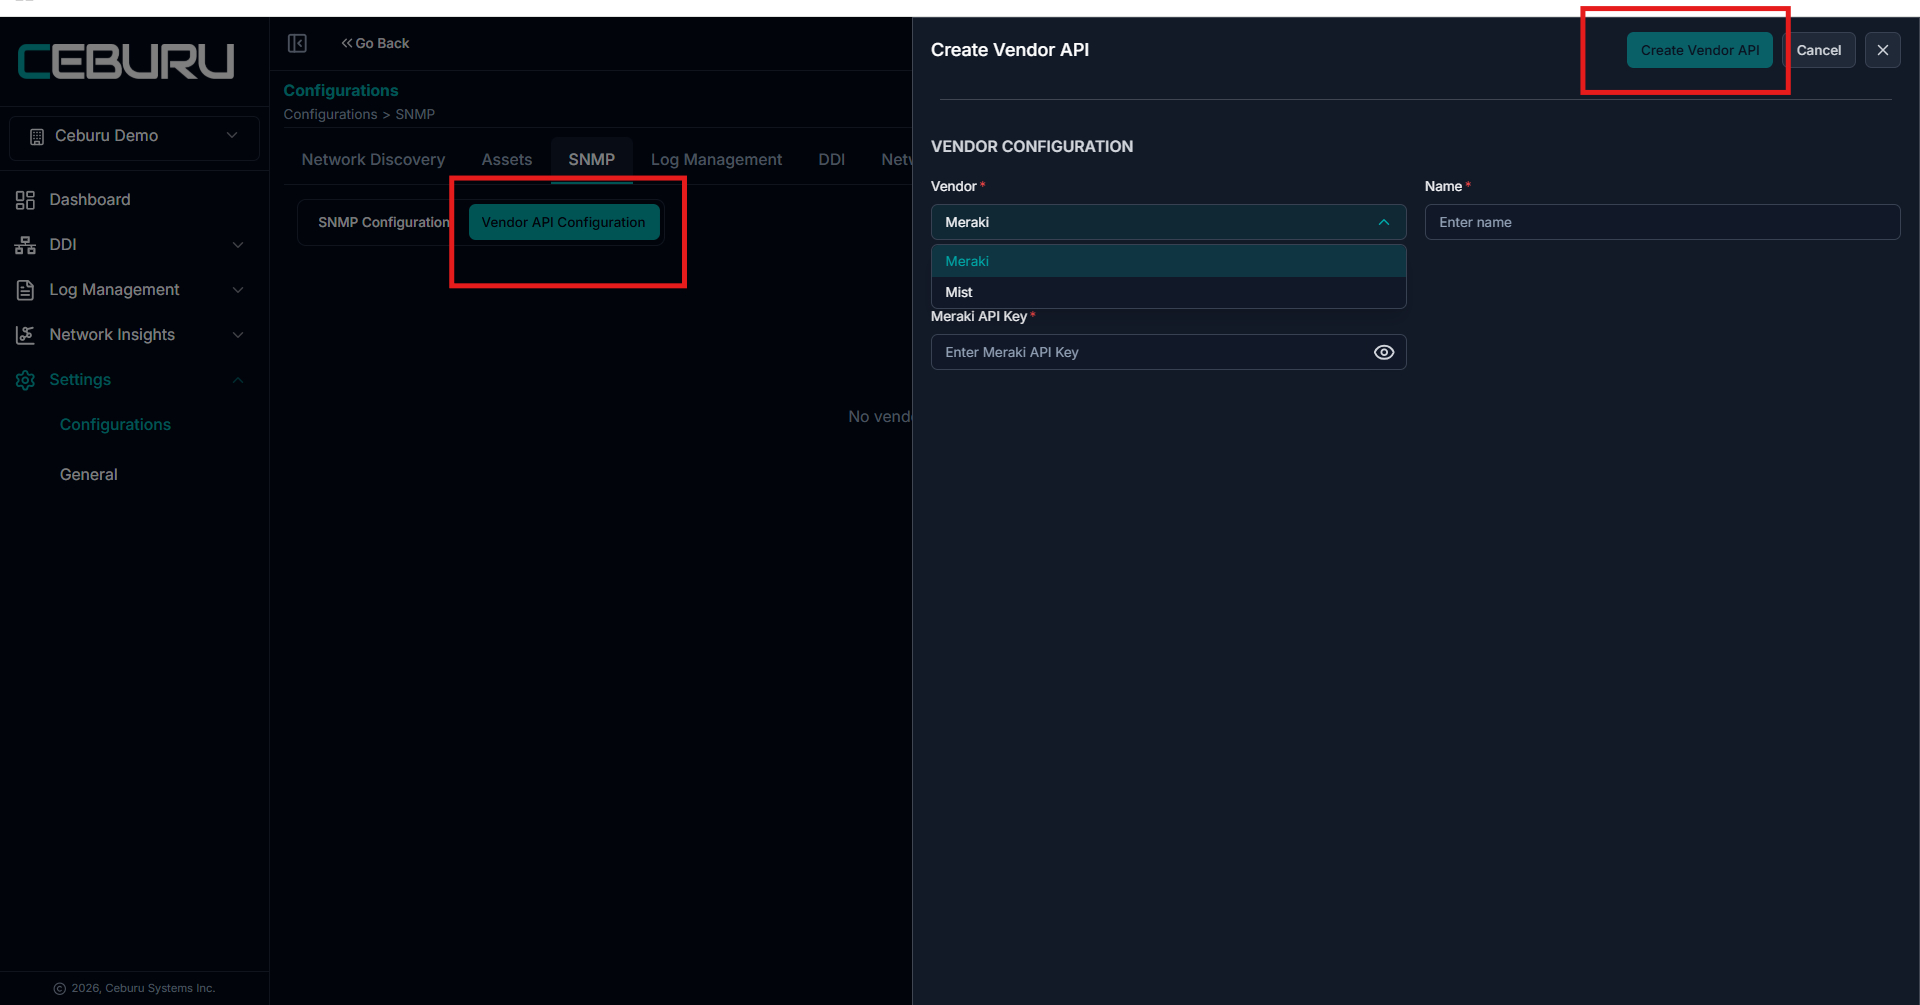
Option 2 - Vendor API Configuration (Meraki / Mist)
Used when infrastructure is managed through vendor cloud platforms.
Path:
Settings → Configurations → SNMP → Vendor API Configuration
Steps:
Click Vendor API Configuration
Click Create Vendor API
Select vendor:
Meraki
Mist
Enter:
Name
API Key
Click Create Vendor API
Vendor API scans:
Pull data directly from vendor cloud
Do not require direct SNMP access
Retrieve topology and device details from vendor-managed networks
Both SNMP and Vendor API methods solve the same purpose but use different data sources.
Was this article helpful?
That’s Great!
Thank you for your feedback
Sorry! We couldn't be helpful
Thank you for your feedback
Feedback sent
We appreciate your effort and will try to fix the article