DDI (DHCP, DNS) in Ceburu provides a centralized way to discover, configure, and manage IP addressing and name resolution services across your network.
Before configuring DHCP or DNS in DDI, the DHCP or DNS server must be added as an Asset.
Step 1: Add DHCP or DNS Server to Assets
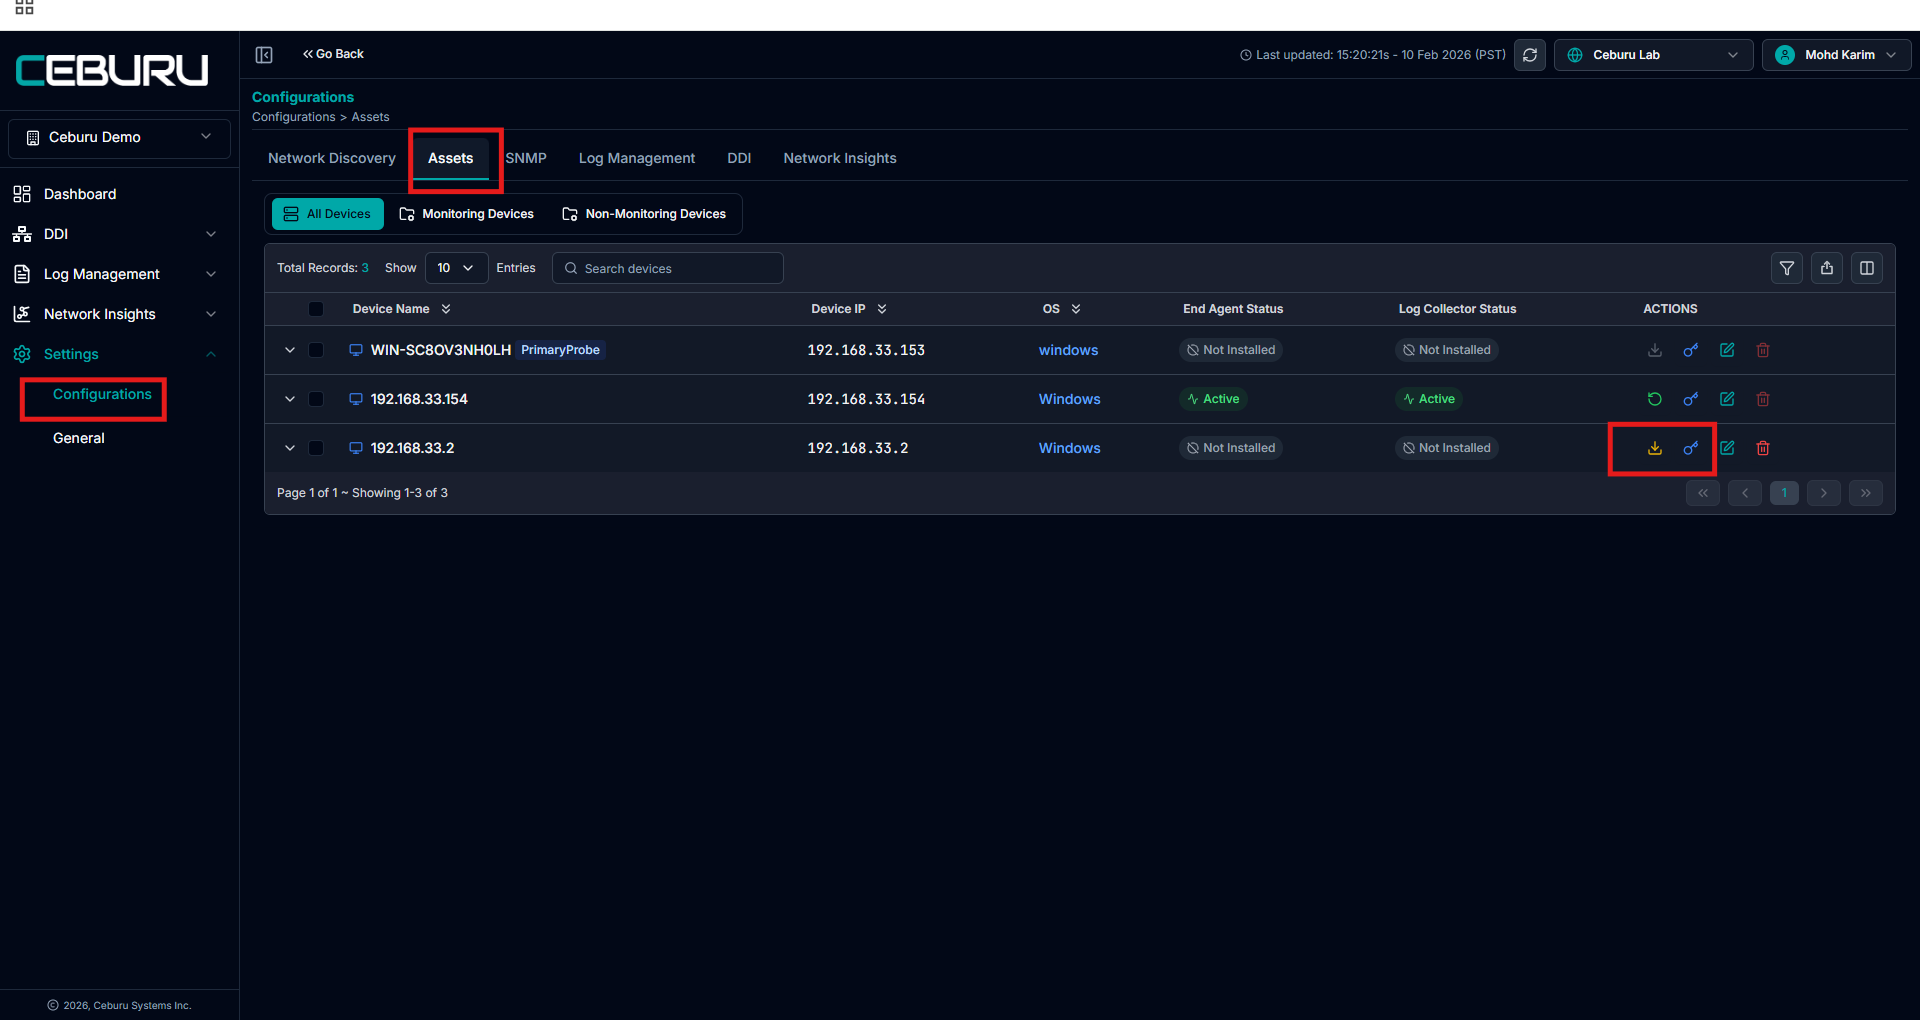
Navigate to Settings → Configurations → Assets
Click Add to Asset in Network Discovery
Provide the following details
Device IP address of the DHCP or DNS server
Operating system (Windows)
Connectivity requirement
If WinRM is enabled on the server
Provide valid Windows credentials
If WinRM is not enabled
Install the End Agent on that machine
After successful adding to Assets, confirm the device appears in the Assets list with reachable status.
DHCP Configuration:
Step 2: Add DHCP Configuration
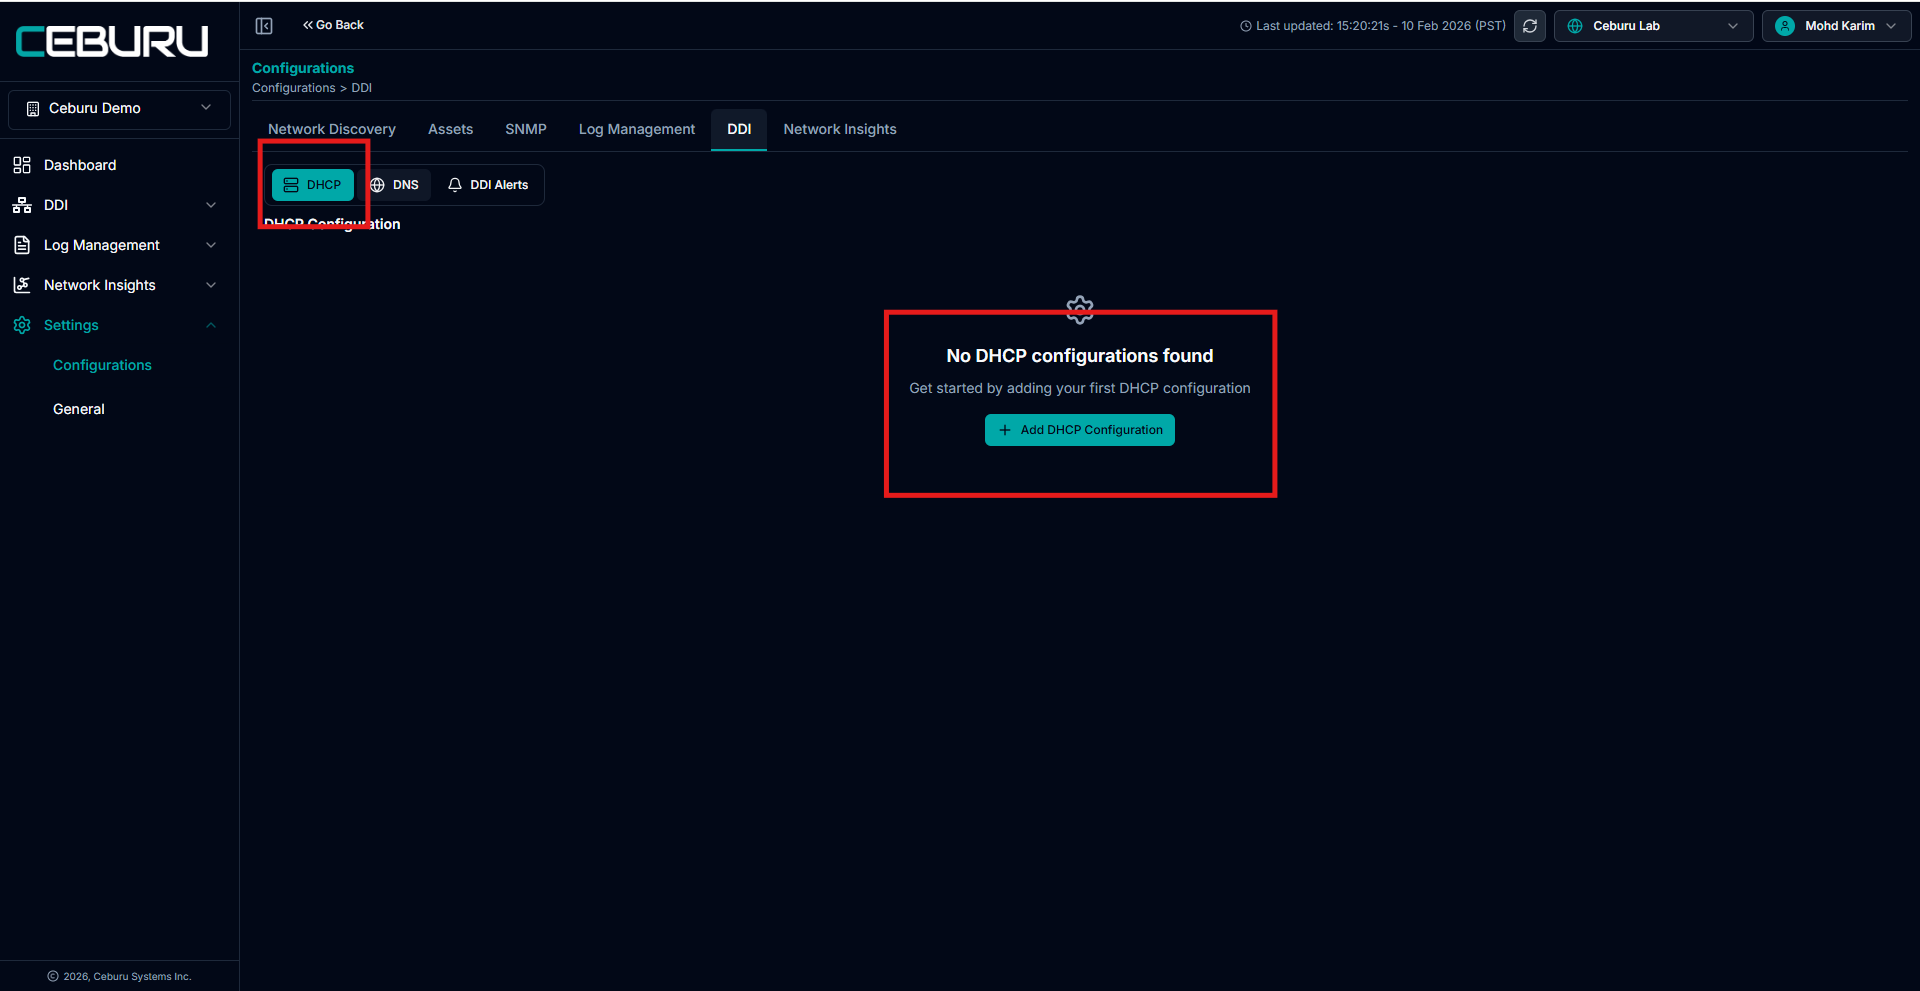
Navigate to Settings → Configurations → DDI
Select the DHCP tab.
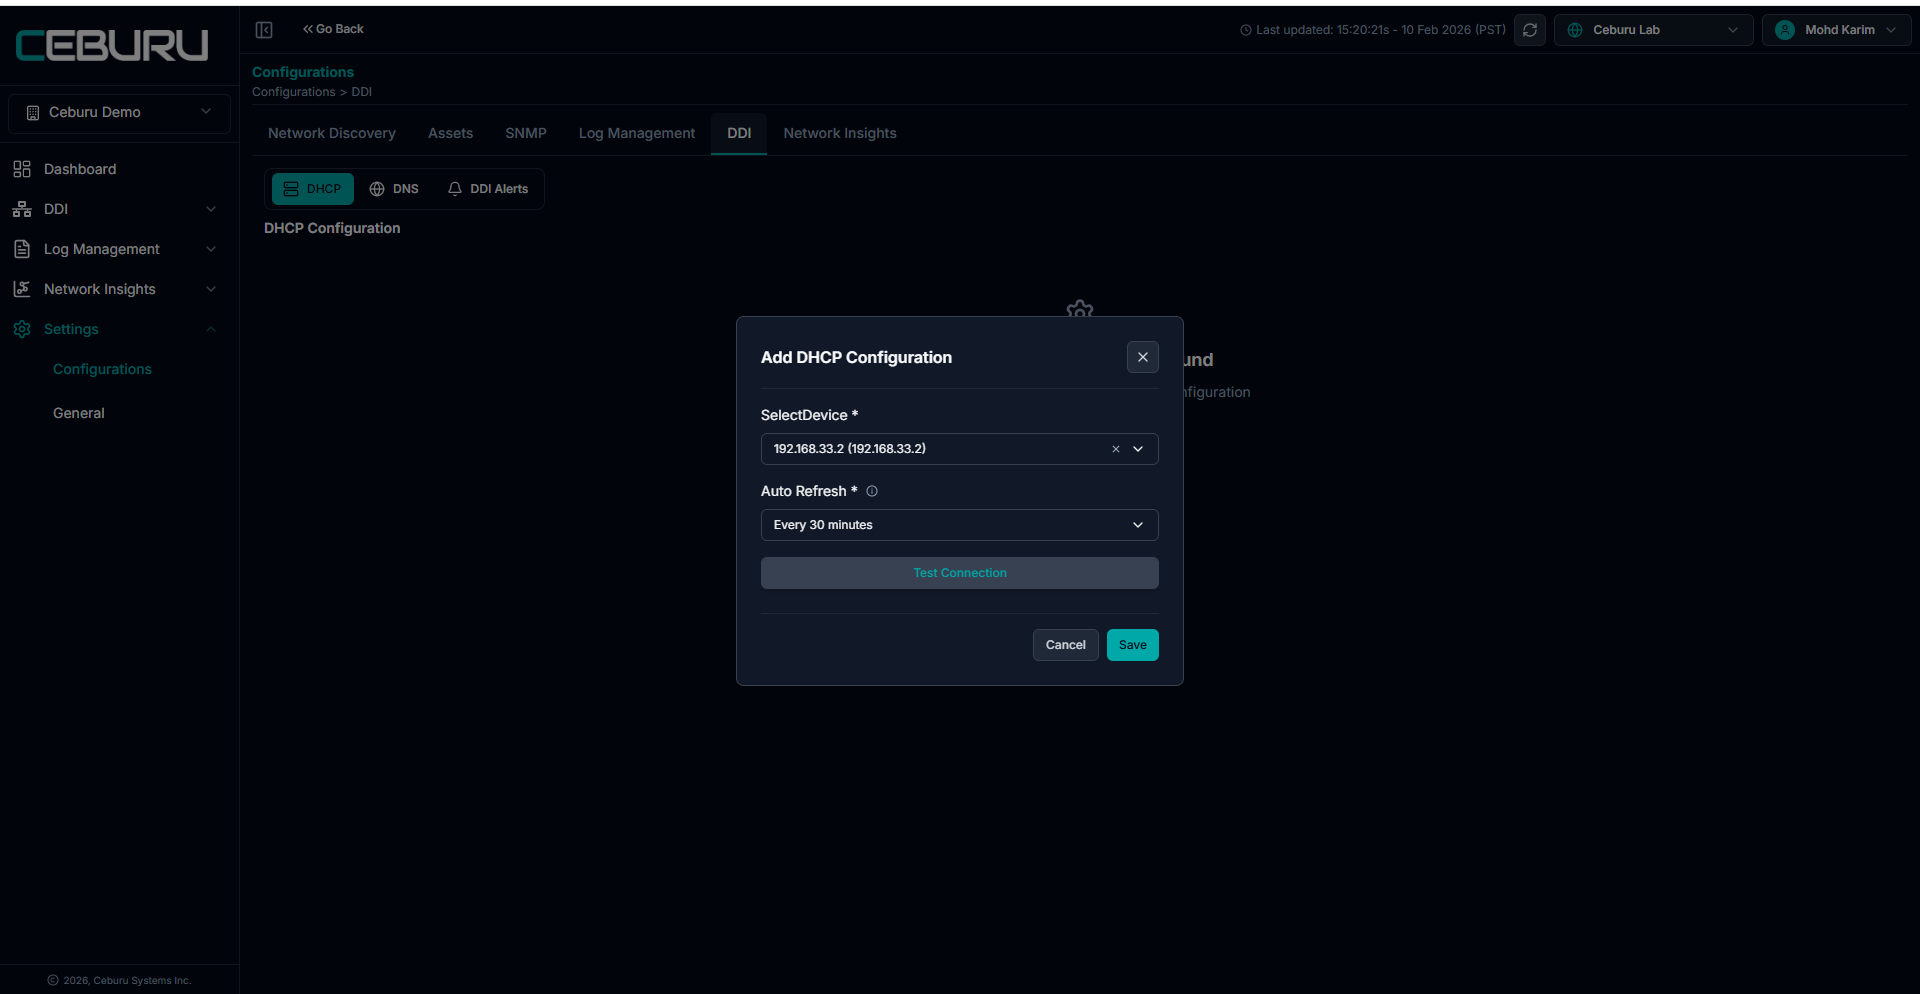
Click Add DHCP Configuration.
Select the DHCP server IP from the Select Device dropdown
Choose an Auto Refresh interval
Example: Every 30 minutes or Disabled
Click Test Connection
This validates whether a DHCP service is available on the selected IP
Ensure the test is successful before proceeding
Click Save.
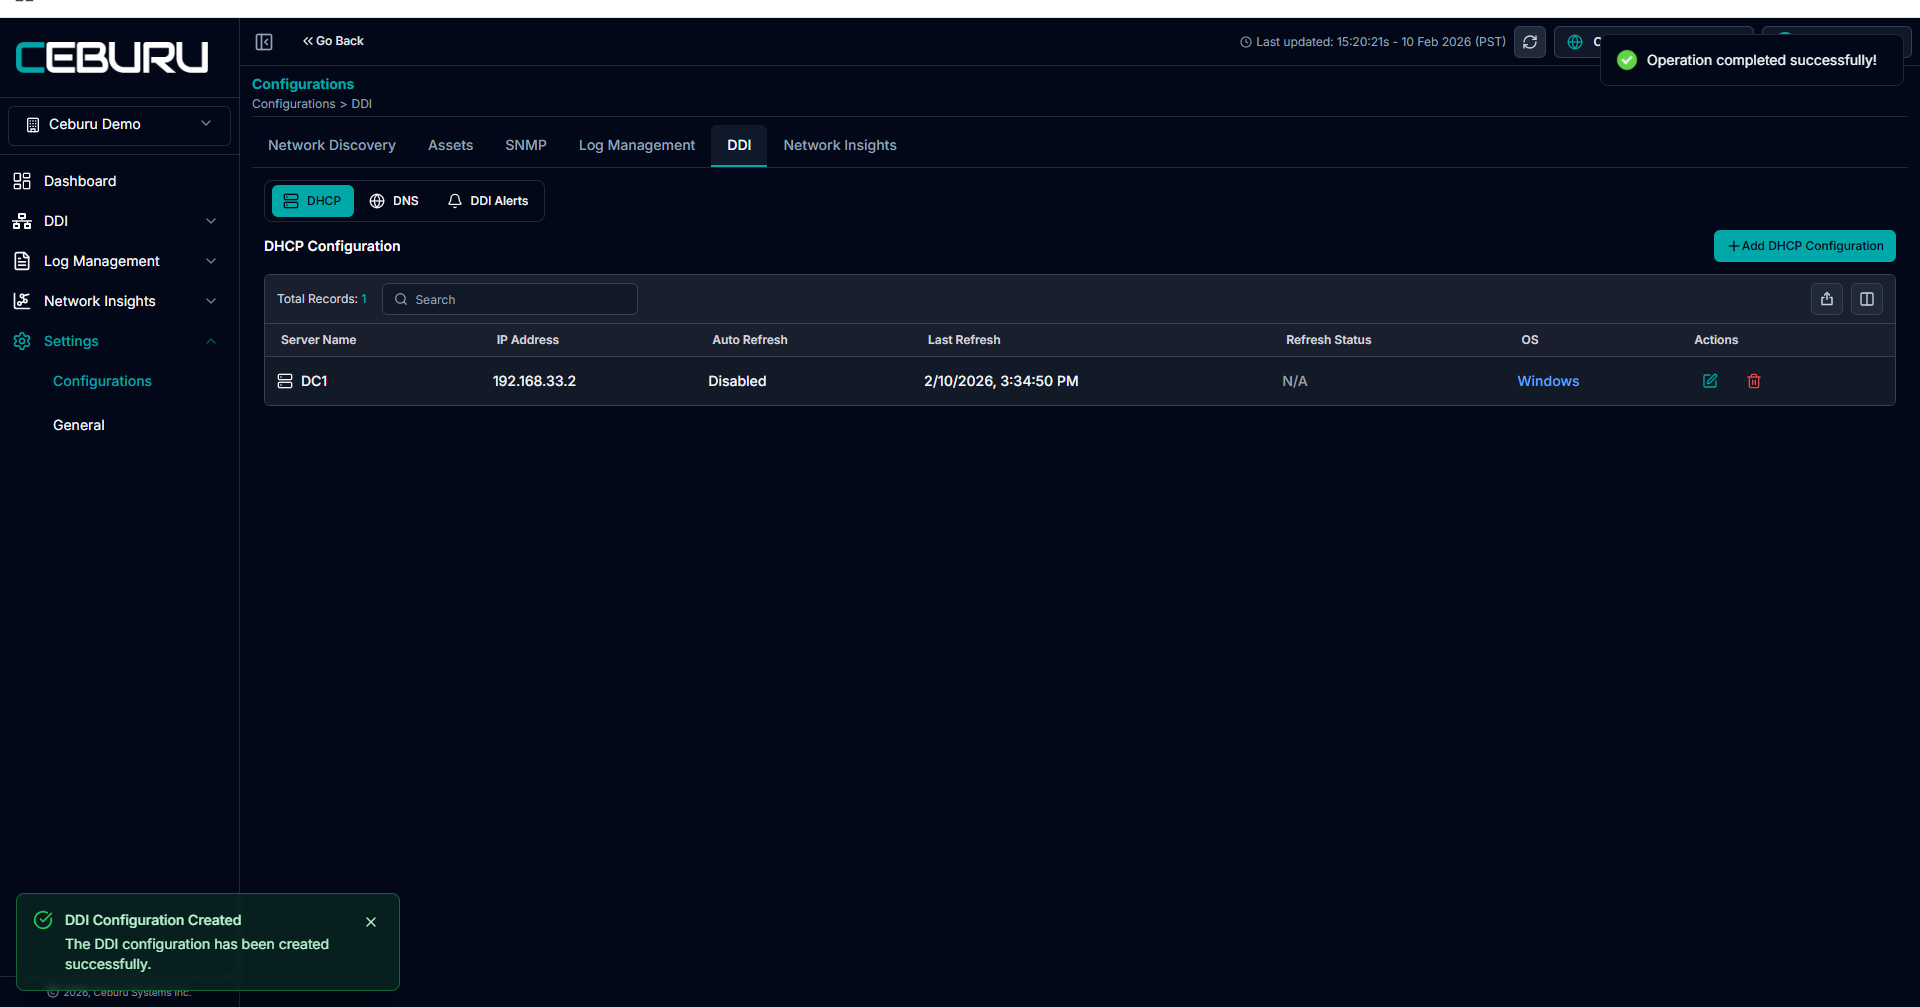
After saving
The DHCP server appears in the DHCP Configuration list
Status, last refresh time, and OS details are displayed
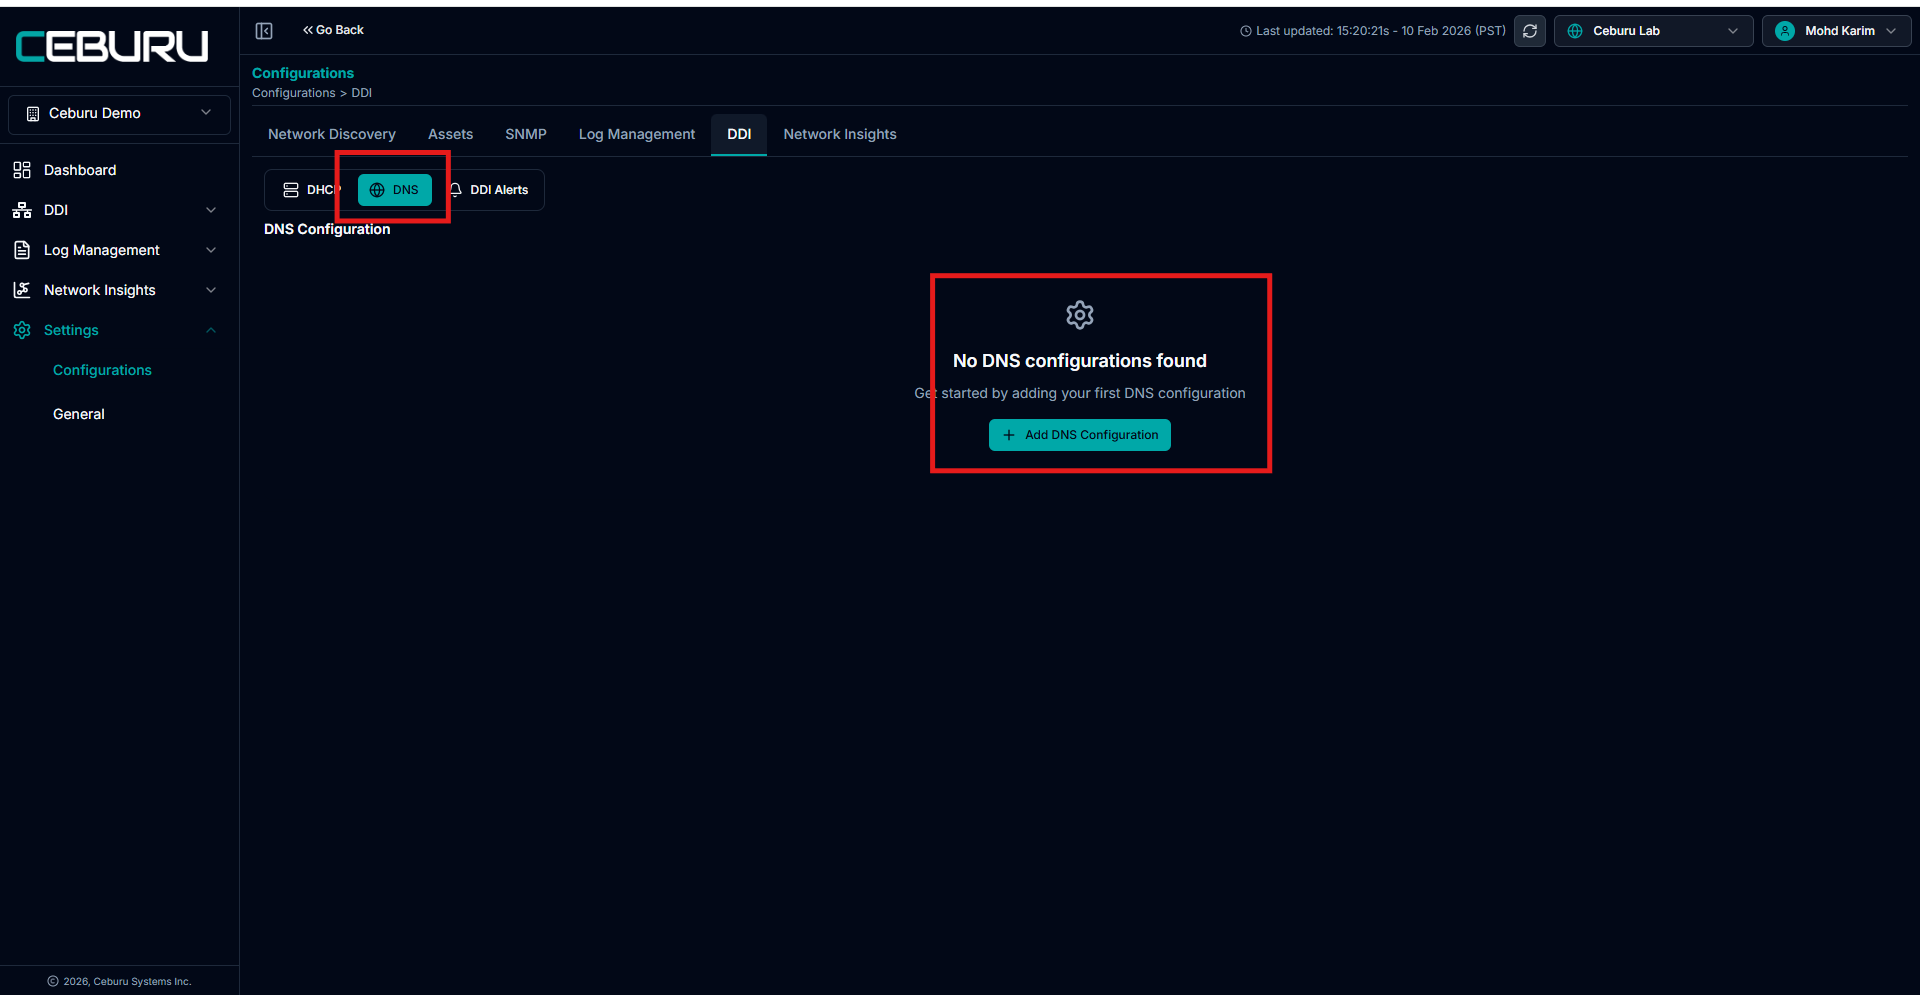
DNS Configuration:
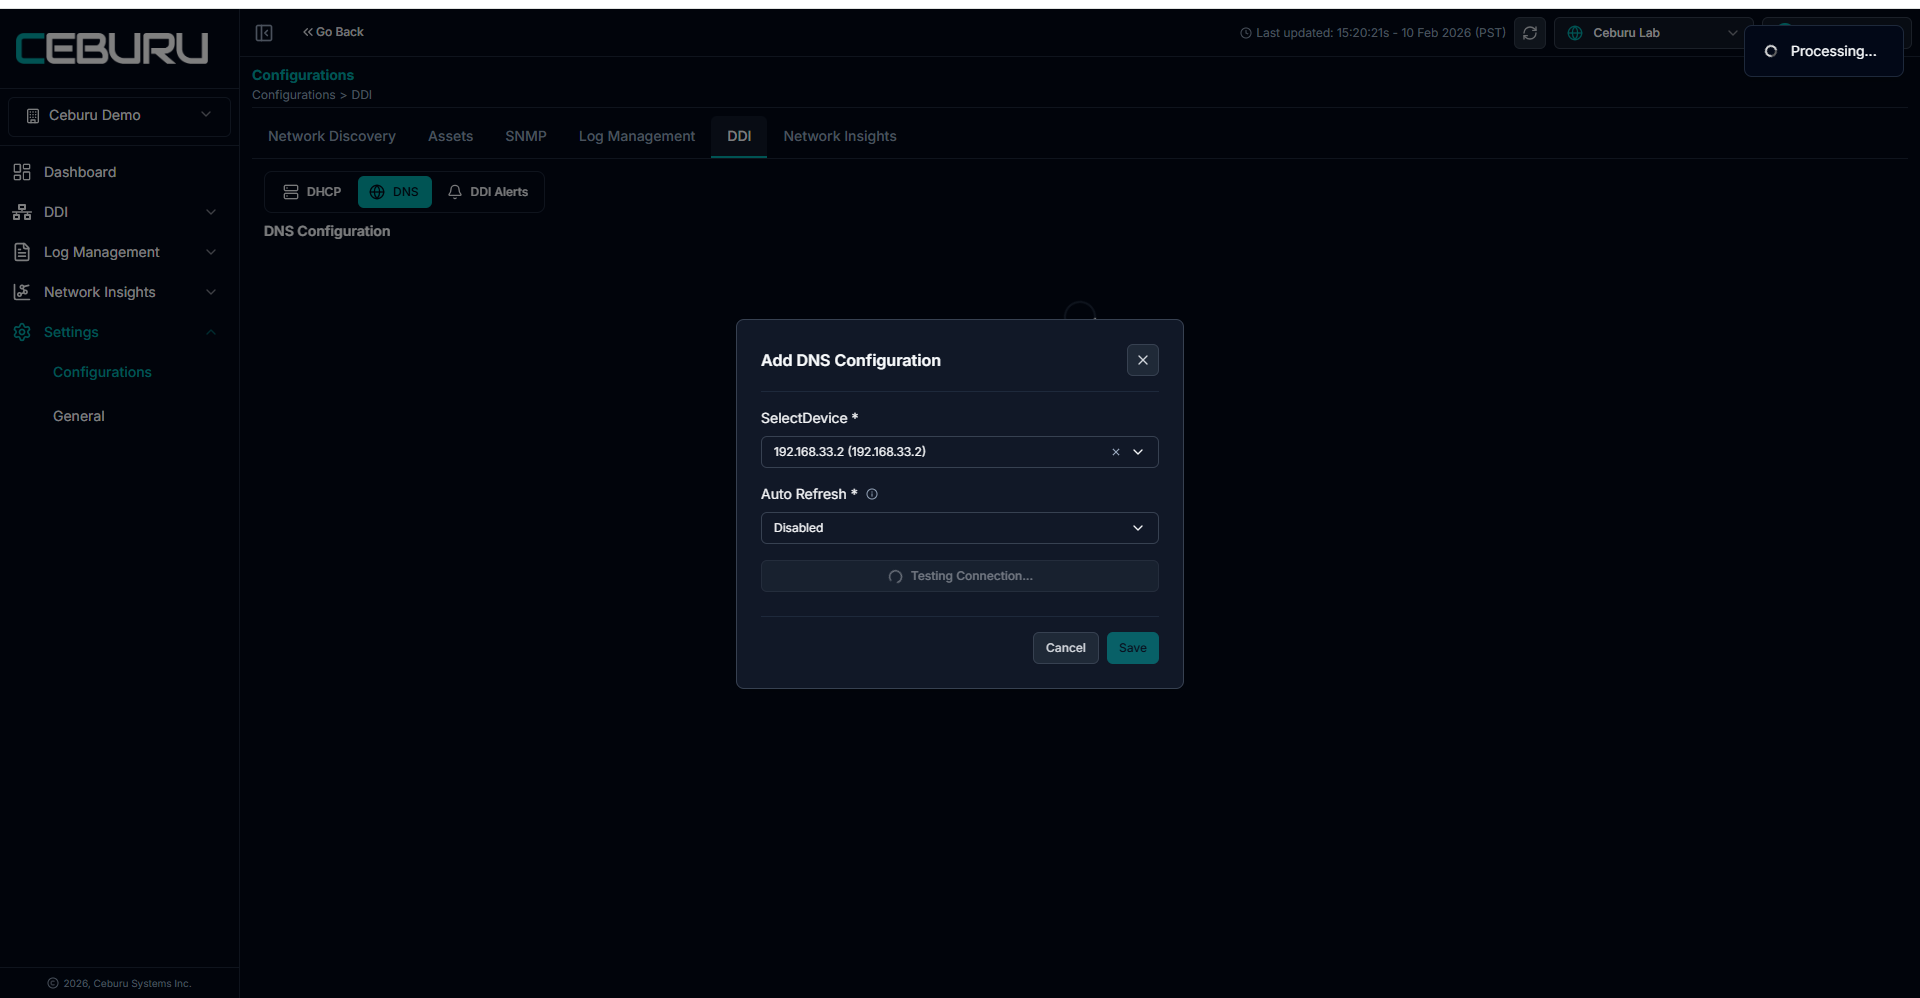
Step 3: Add DNS Configuration
Navigate to
Settings → Configurations → DDISelect the DNS tab.
Click Add DNS Configuration.
Select the DNS server IP from the Select Device dropdown
Configure Auto Refresh as required
Click Test Connection
This verifies DNS service availability on the selected server
Click Save.
After saving
The DNS server appears in the DNS Configuration list
Note:
Manual Refresh:
Manual refresh allows administrators to immediately synchronize data from the DHCP or DNS server.
When manual refresh is triggered:
The platform fetches the latest scopes, IPs, leases, exclusions, and reservations from the configured DHCP server IP
Any changes made directly on the DHCP server are reflected instantly in IPAM
Status updates such as available, reserved, excluded, or inactive are recalculated
Manual refresh is typically used after configuration changes or troubleshooting activities.

Auto Refresh :
Auto refresh runs at configured intervals to keep data up to date.
During auto refresh:
DHCP server utilization is recalculated
Scope and server utilization thresholds are evaluated
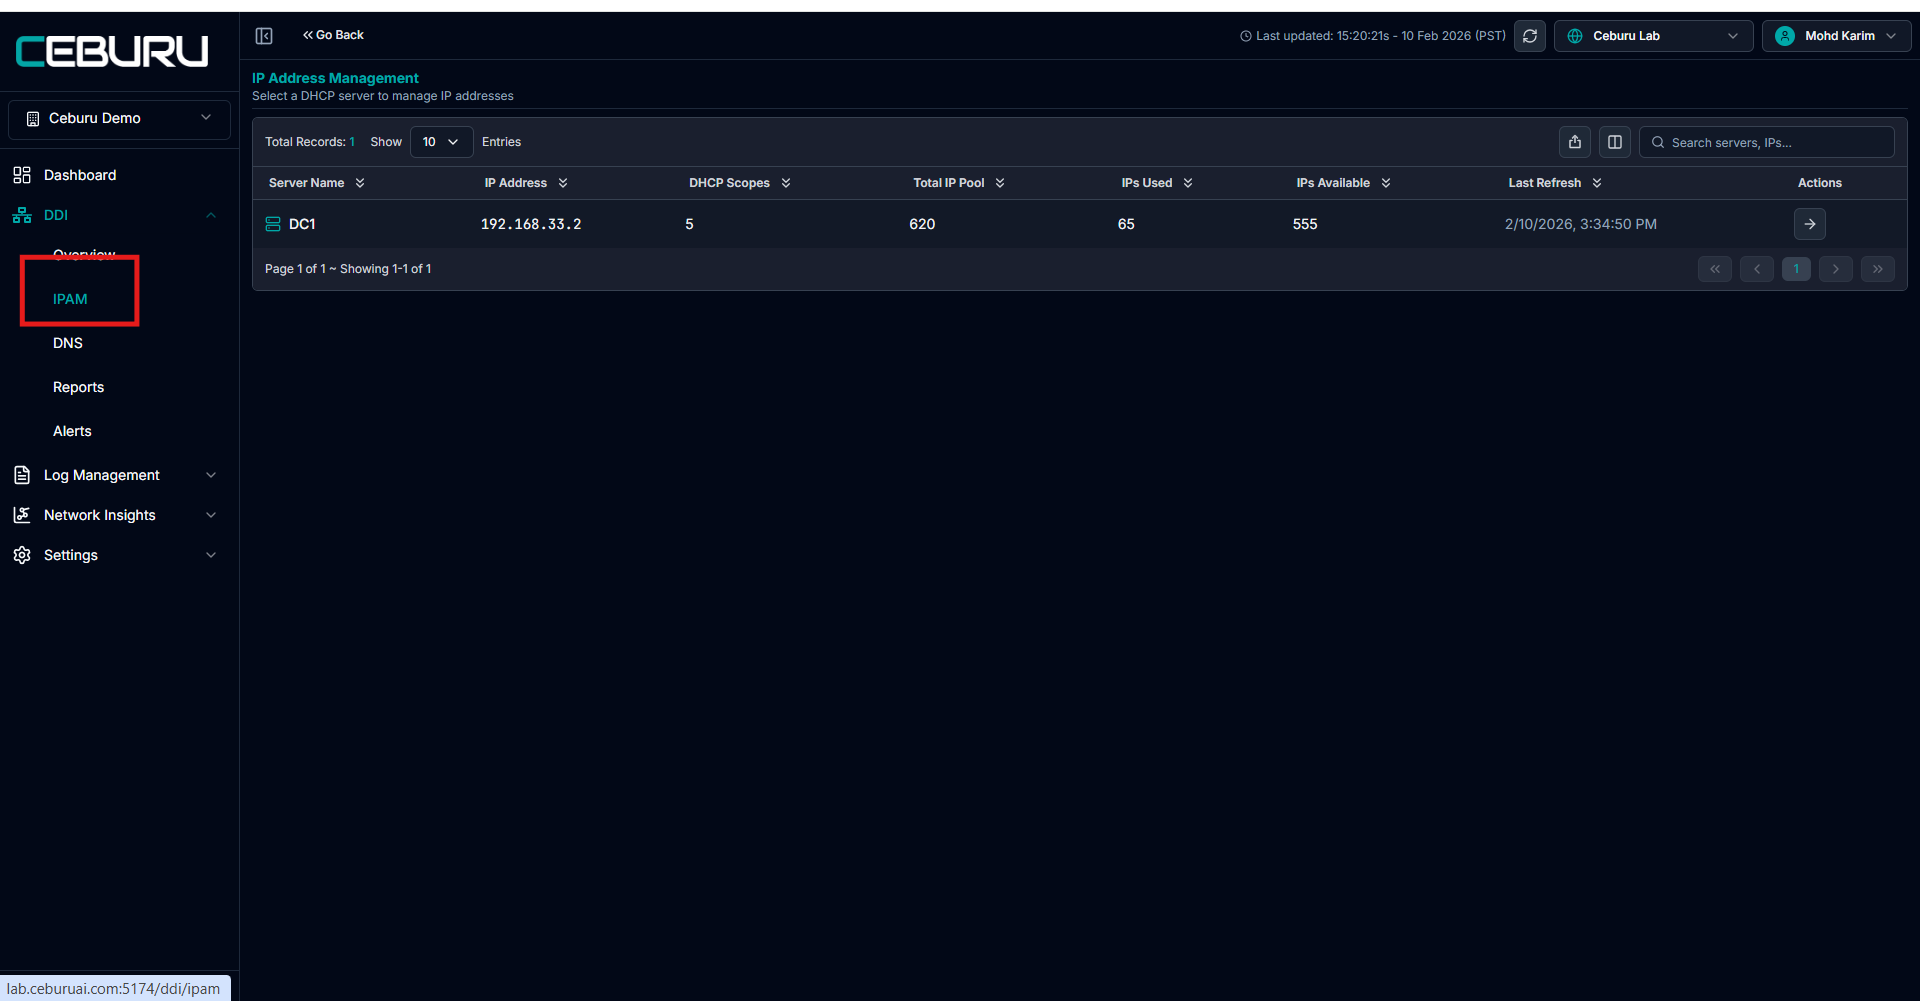
Accessing IPAM/DNS:
Step 4: Navigate to IPAM/DNS
From the left navigation panel, go to
DDI → IPAM click the link > DDI - IPAM
DDI → DNS click the link > DDI - DNS
Was this article helpful?
That’s Great!
Thank you for your feedback
Sorry! We couldn't be helpful
Thank you for your feedback
Feedback sent
We appreciate your effort and will try to fix the article